Contracts Guide 1/9 — Prepare Your Customers and Drivers
Before your first contract: add customers and document drivers. Learn the customers list, adding a customer with blocklist check, and the 2-step driver documentation with automatic OCR.
📄 Contracts Guide Series — Part 1 of 9 · Stage: Preparation · Full series index
🗺 Guide map — the contract lifecycle in 9 parts
This series follows the contract exactly as you live it: prepare the customer, create and sign, hand over the car, manage the money, extend when needed, then close or cancel. Read the parts in order — each one leads to the next.
- Prepare Your Customers and Drivers (Preparation)
- Create a New Contract with the Wizard (Creating the contract)
- The E-Contract, Signatures and Sharing (Creating the contract)
- Hand Over the Car and Document Its Condition (Operation)
- Payments and Debts on the Contract (Finance)
- Discounts and the Receipt Voucher (Finance)
- Extend the Contract Without Creating a New One (Operation)
- Receive the Car Back and Close the Contract (Closing)
- Cancel a Contract the Right Way (Closing)
What you will learn
- Browse the customers list and read each customer's debts and balance from their card.
- Add a new customer (individual or company) and run the blocklist check before contracting.
- Document a new driver in two steps, with their data auto-filled from a photo of their document.
Before you start
- You need an account with customer/driver management permissions (the company owner always has them).
- Prepare a clear photo of the driver's document (ID card, driving licence, or passport).
Step 1: Browse your customers list
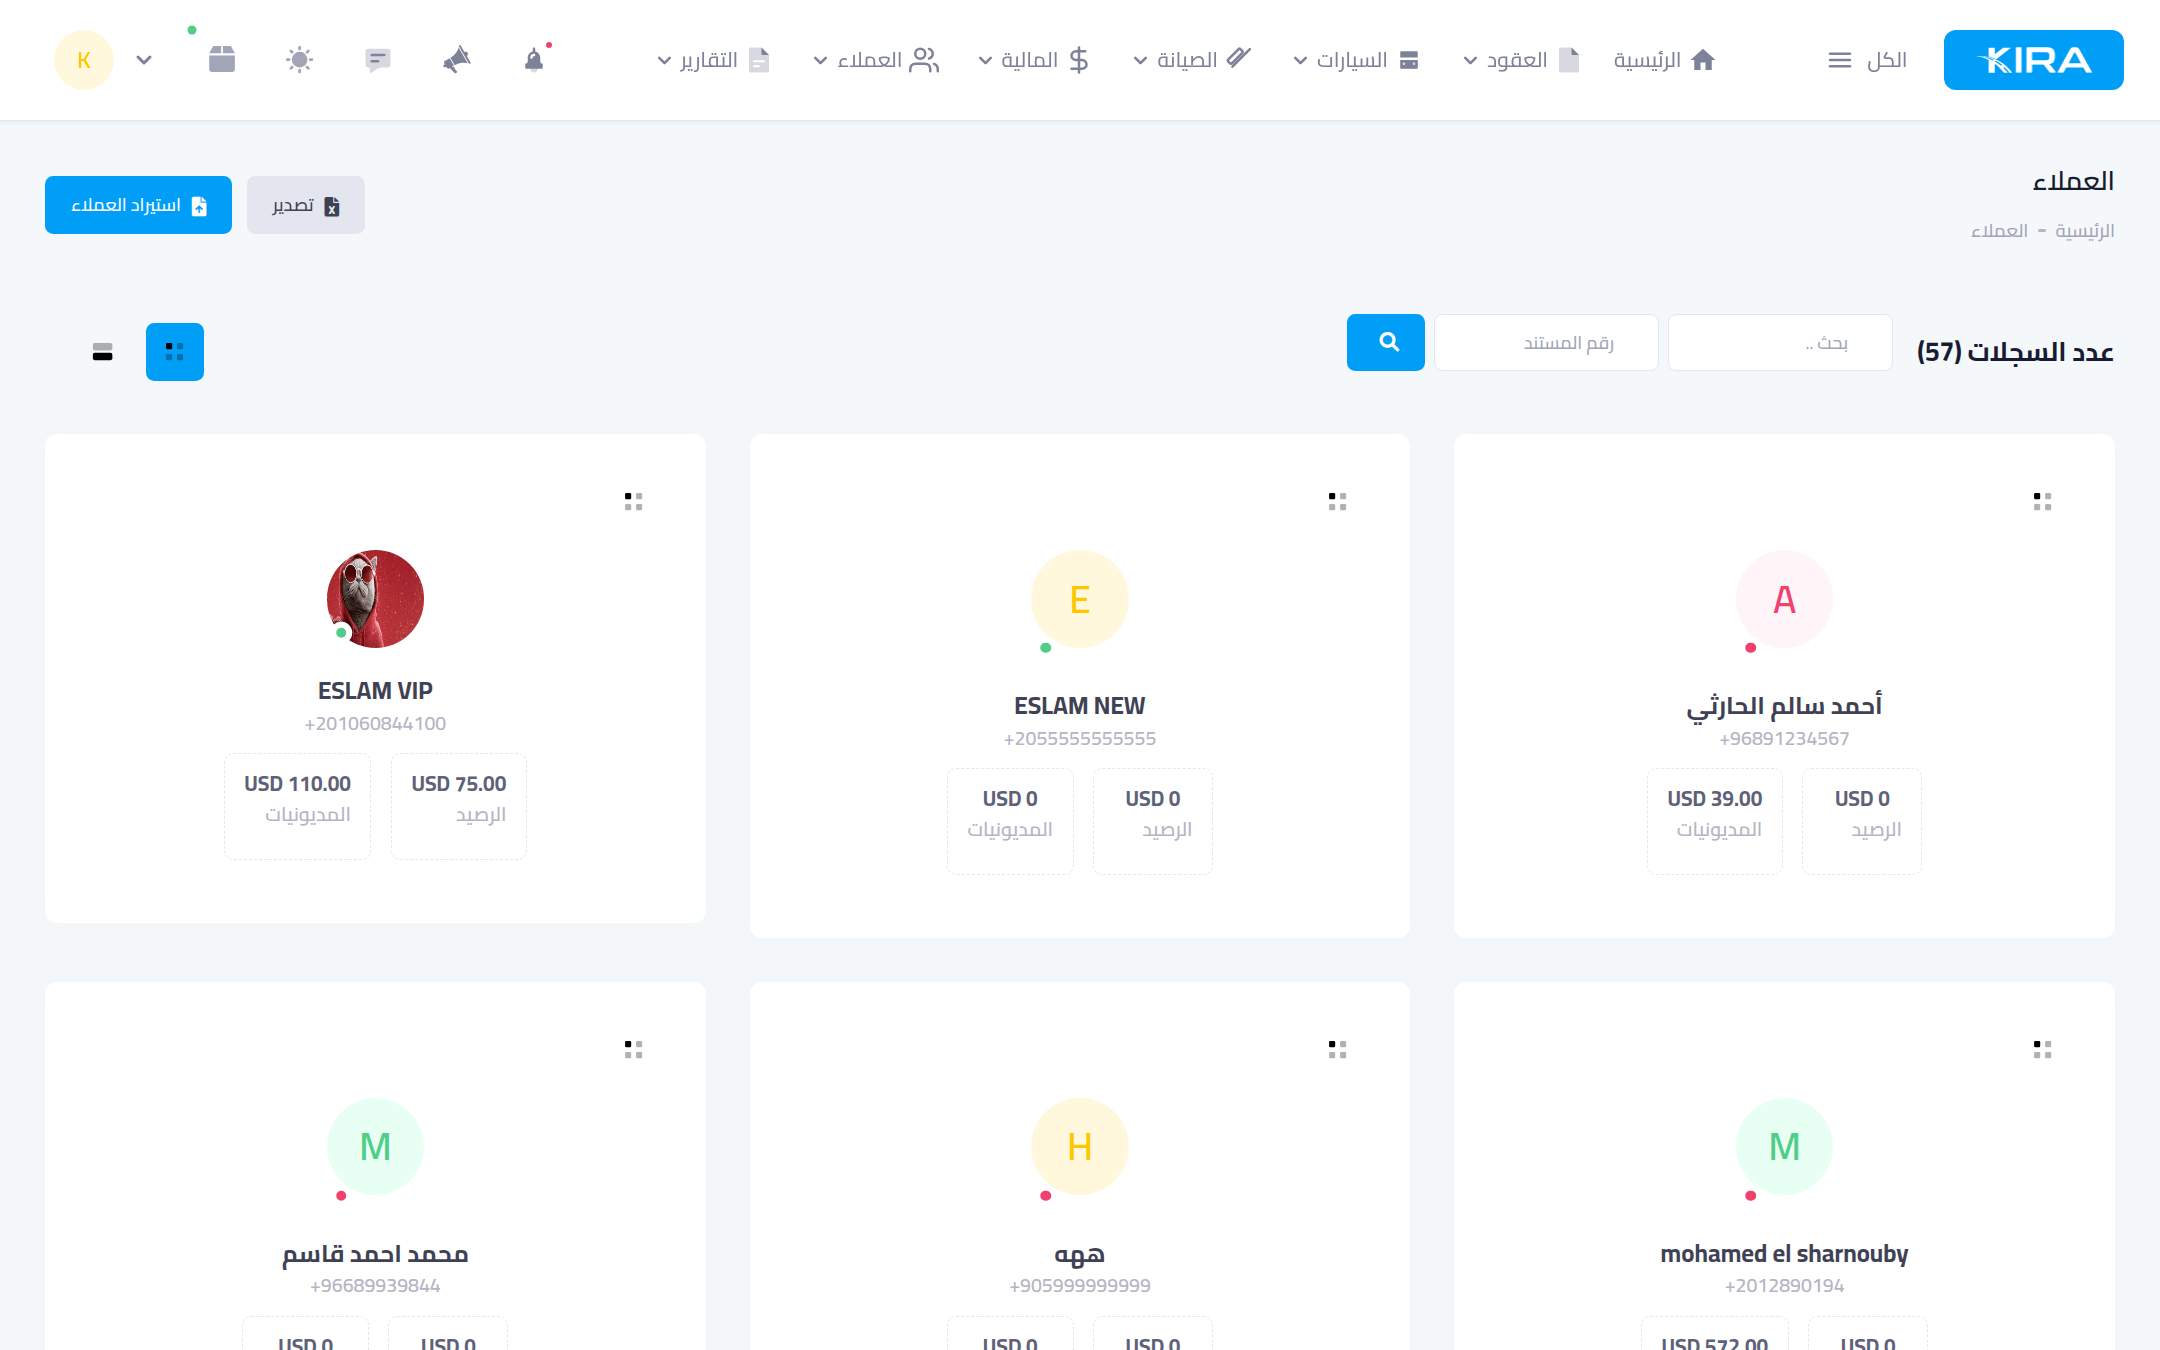
From the top menu open “Customers”. Each customer appears as a card with their name and phone plus two live financial indicators: “Debts” (what they owe you) and “Balance” (what they hold in their wallet with you). Use the search box for quick access, and the “Import customers” / “Export” buttons to move data in and out via Excel.
Step 2: Add a new customer
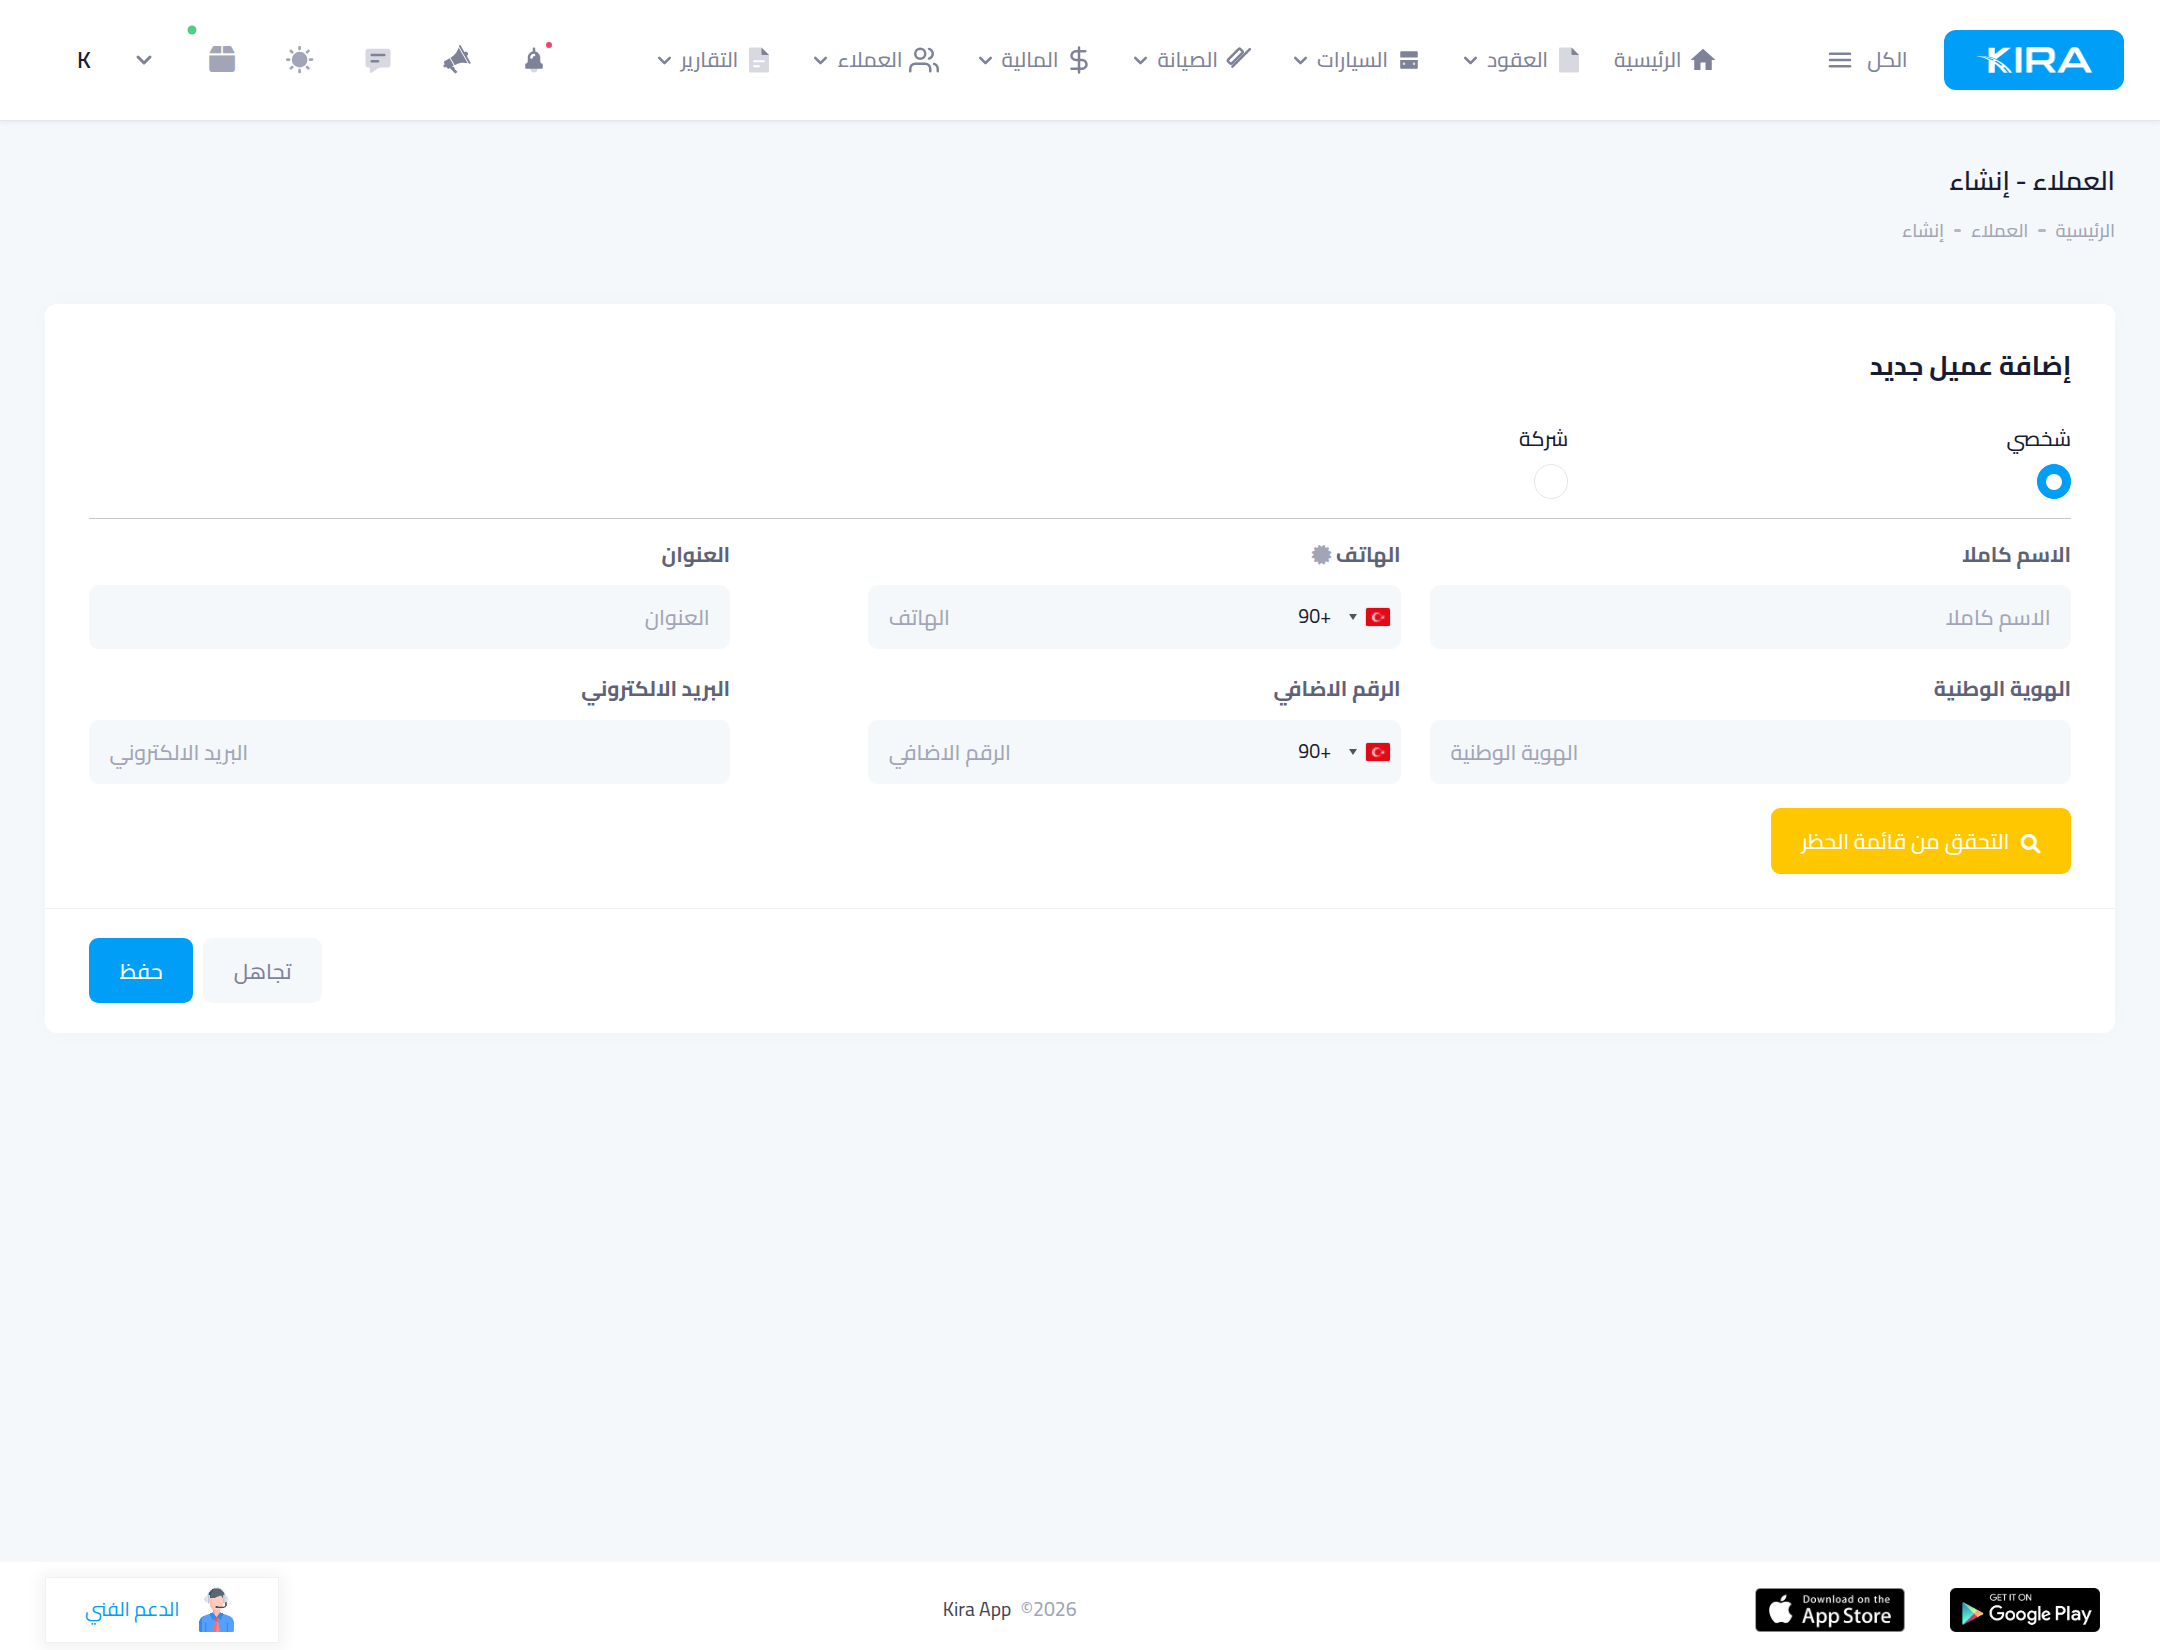
Click the add button inside the customers page (or add the customer later directly from the contract wizard). Choose the type: “Individual” or “Company”, then enter the full name and phone number with the correct country code — this is the number that will receive WhatsApp notifications and the e-contract link later.
Before saving, click “Check the blocklist”: the platform checks the customer's number across the KIRA network and warns you if they are blocked by other rental companies — the warning can be overridden, but the decision is yours.
Step 3: Document the driver — basic info
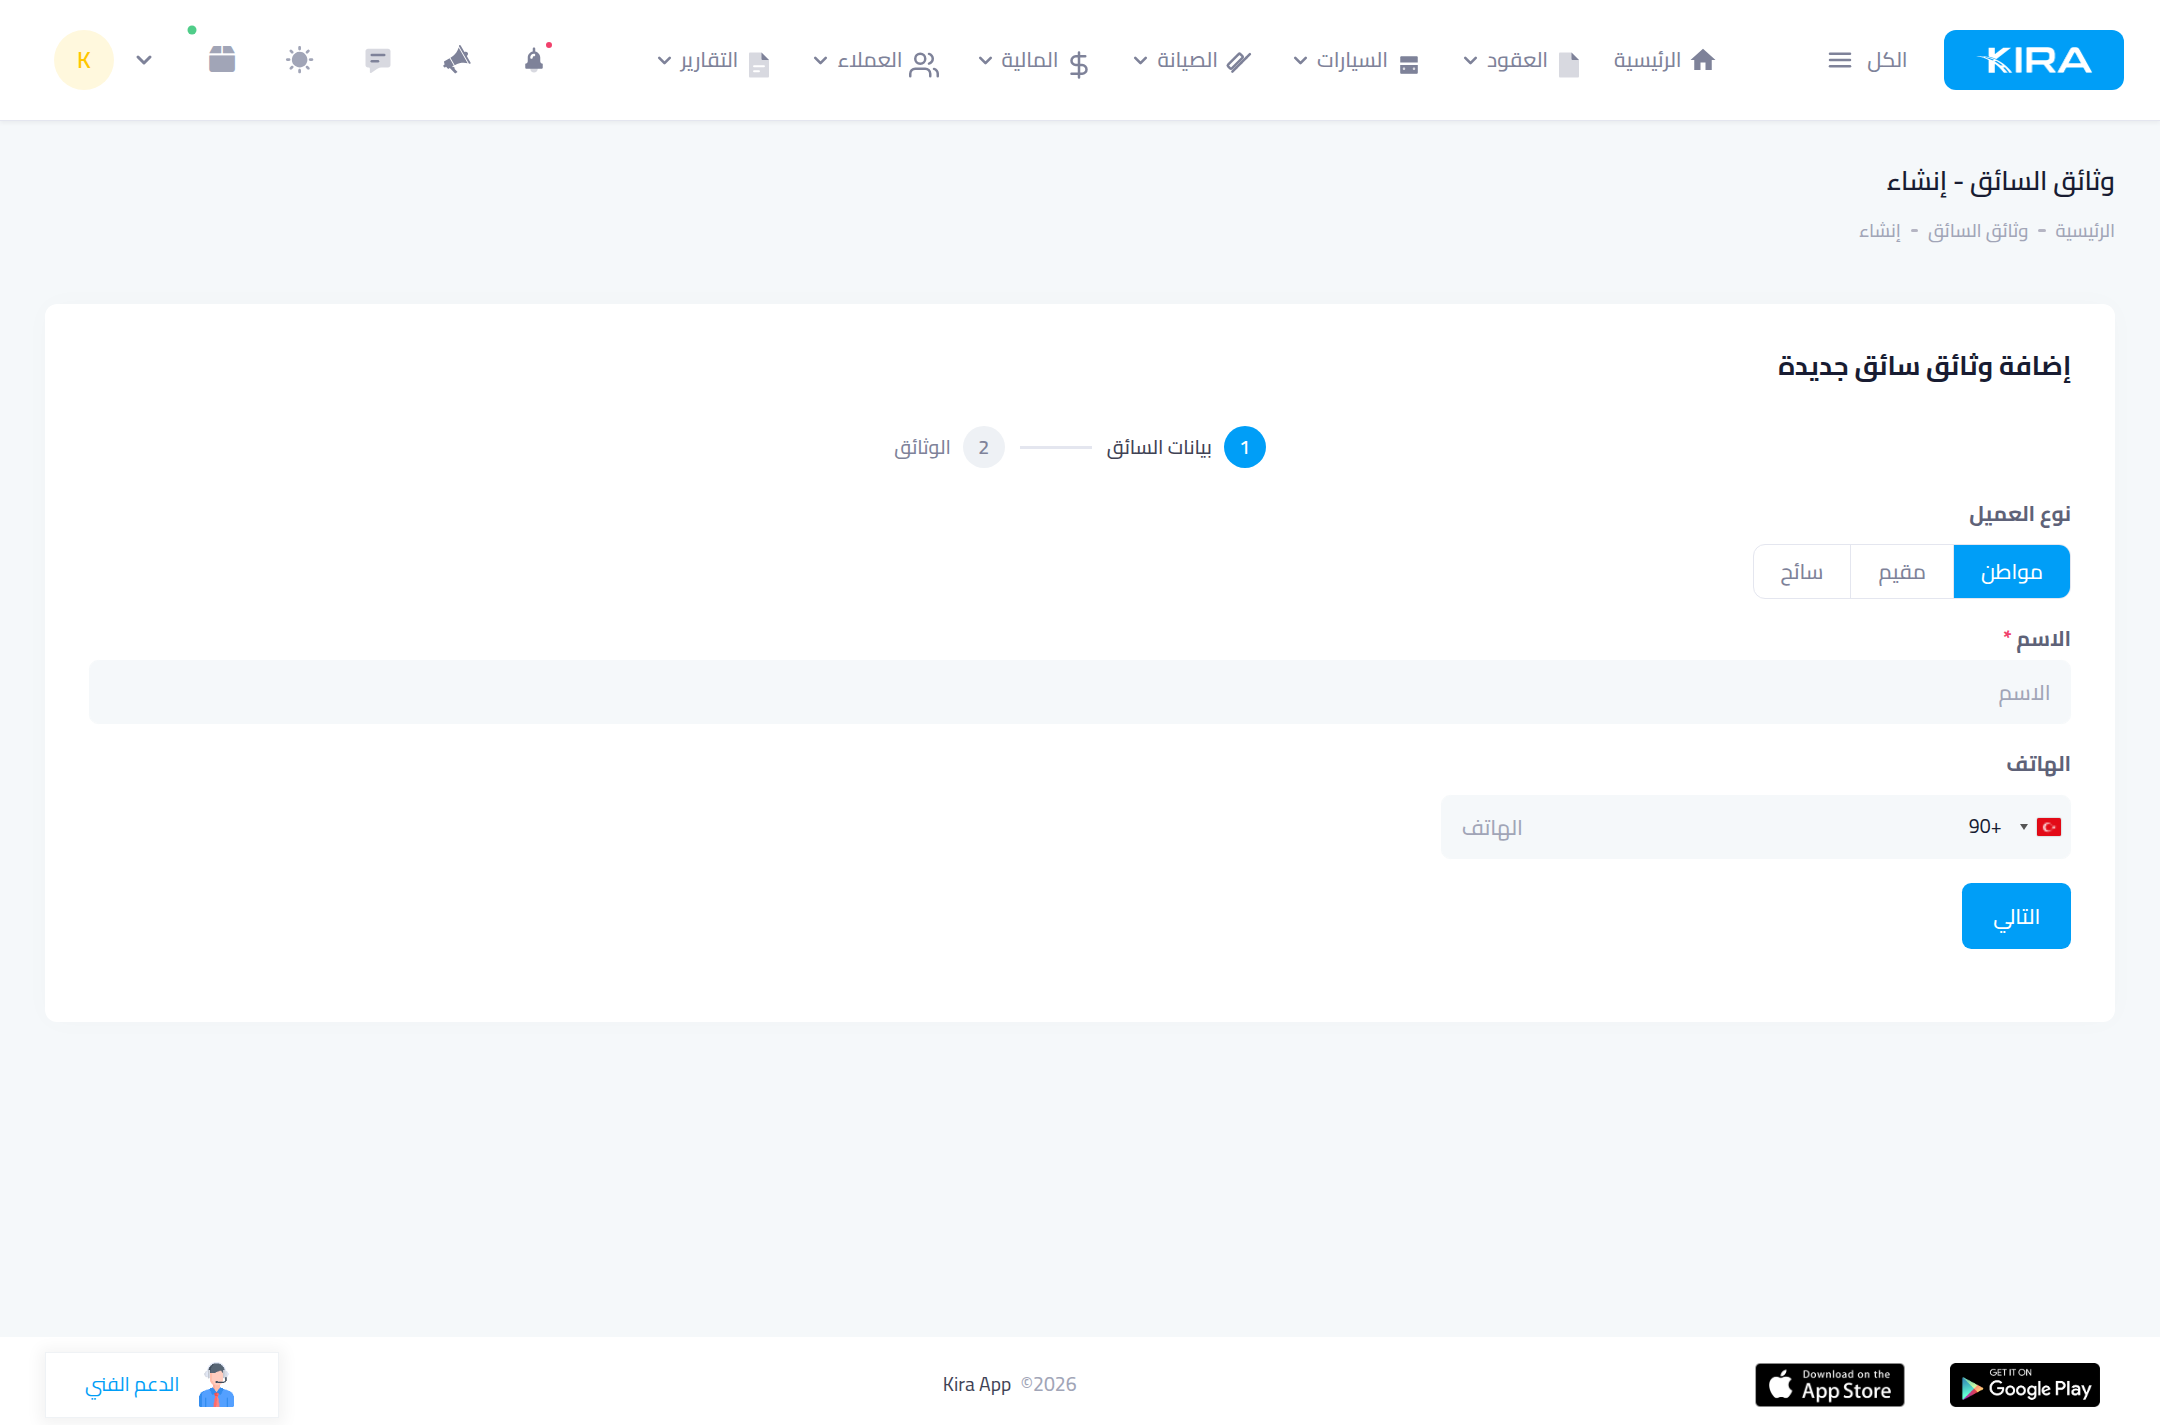
From the “Customers” menu open “Driver documents” and click add. In step one choose the client type (citizen / resident / tourist), enter the driver's name and phone, then press “Next”.
Step 4: Upload the document — auto-filled by OCR
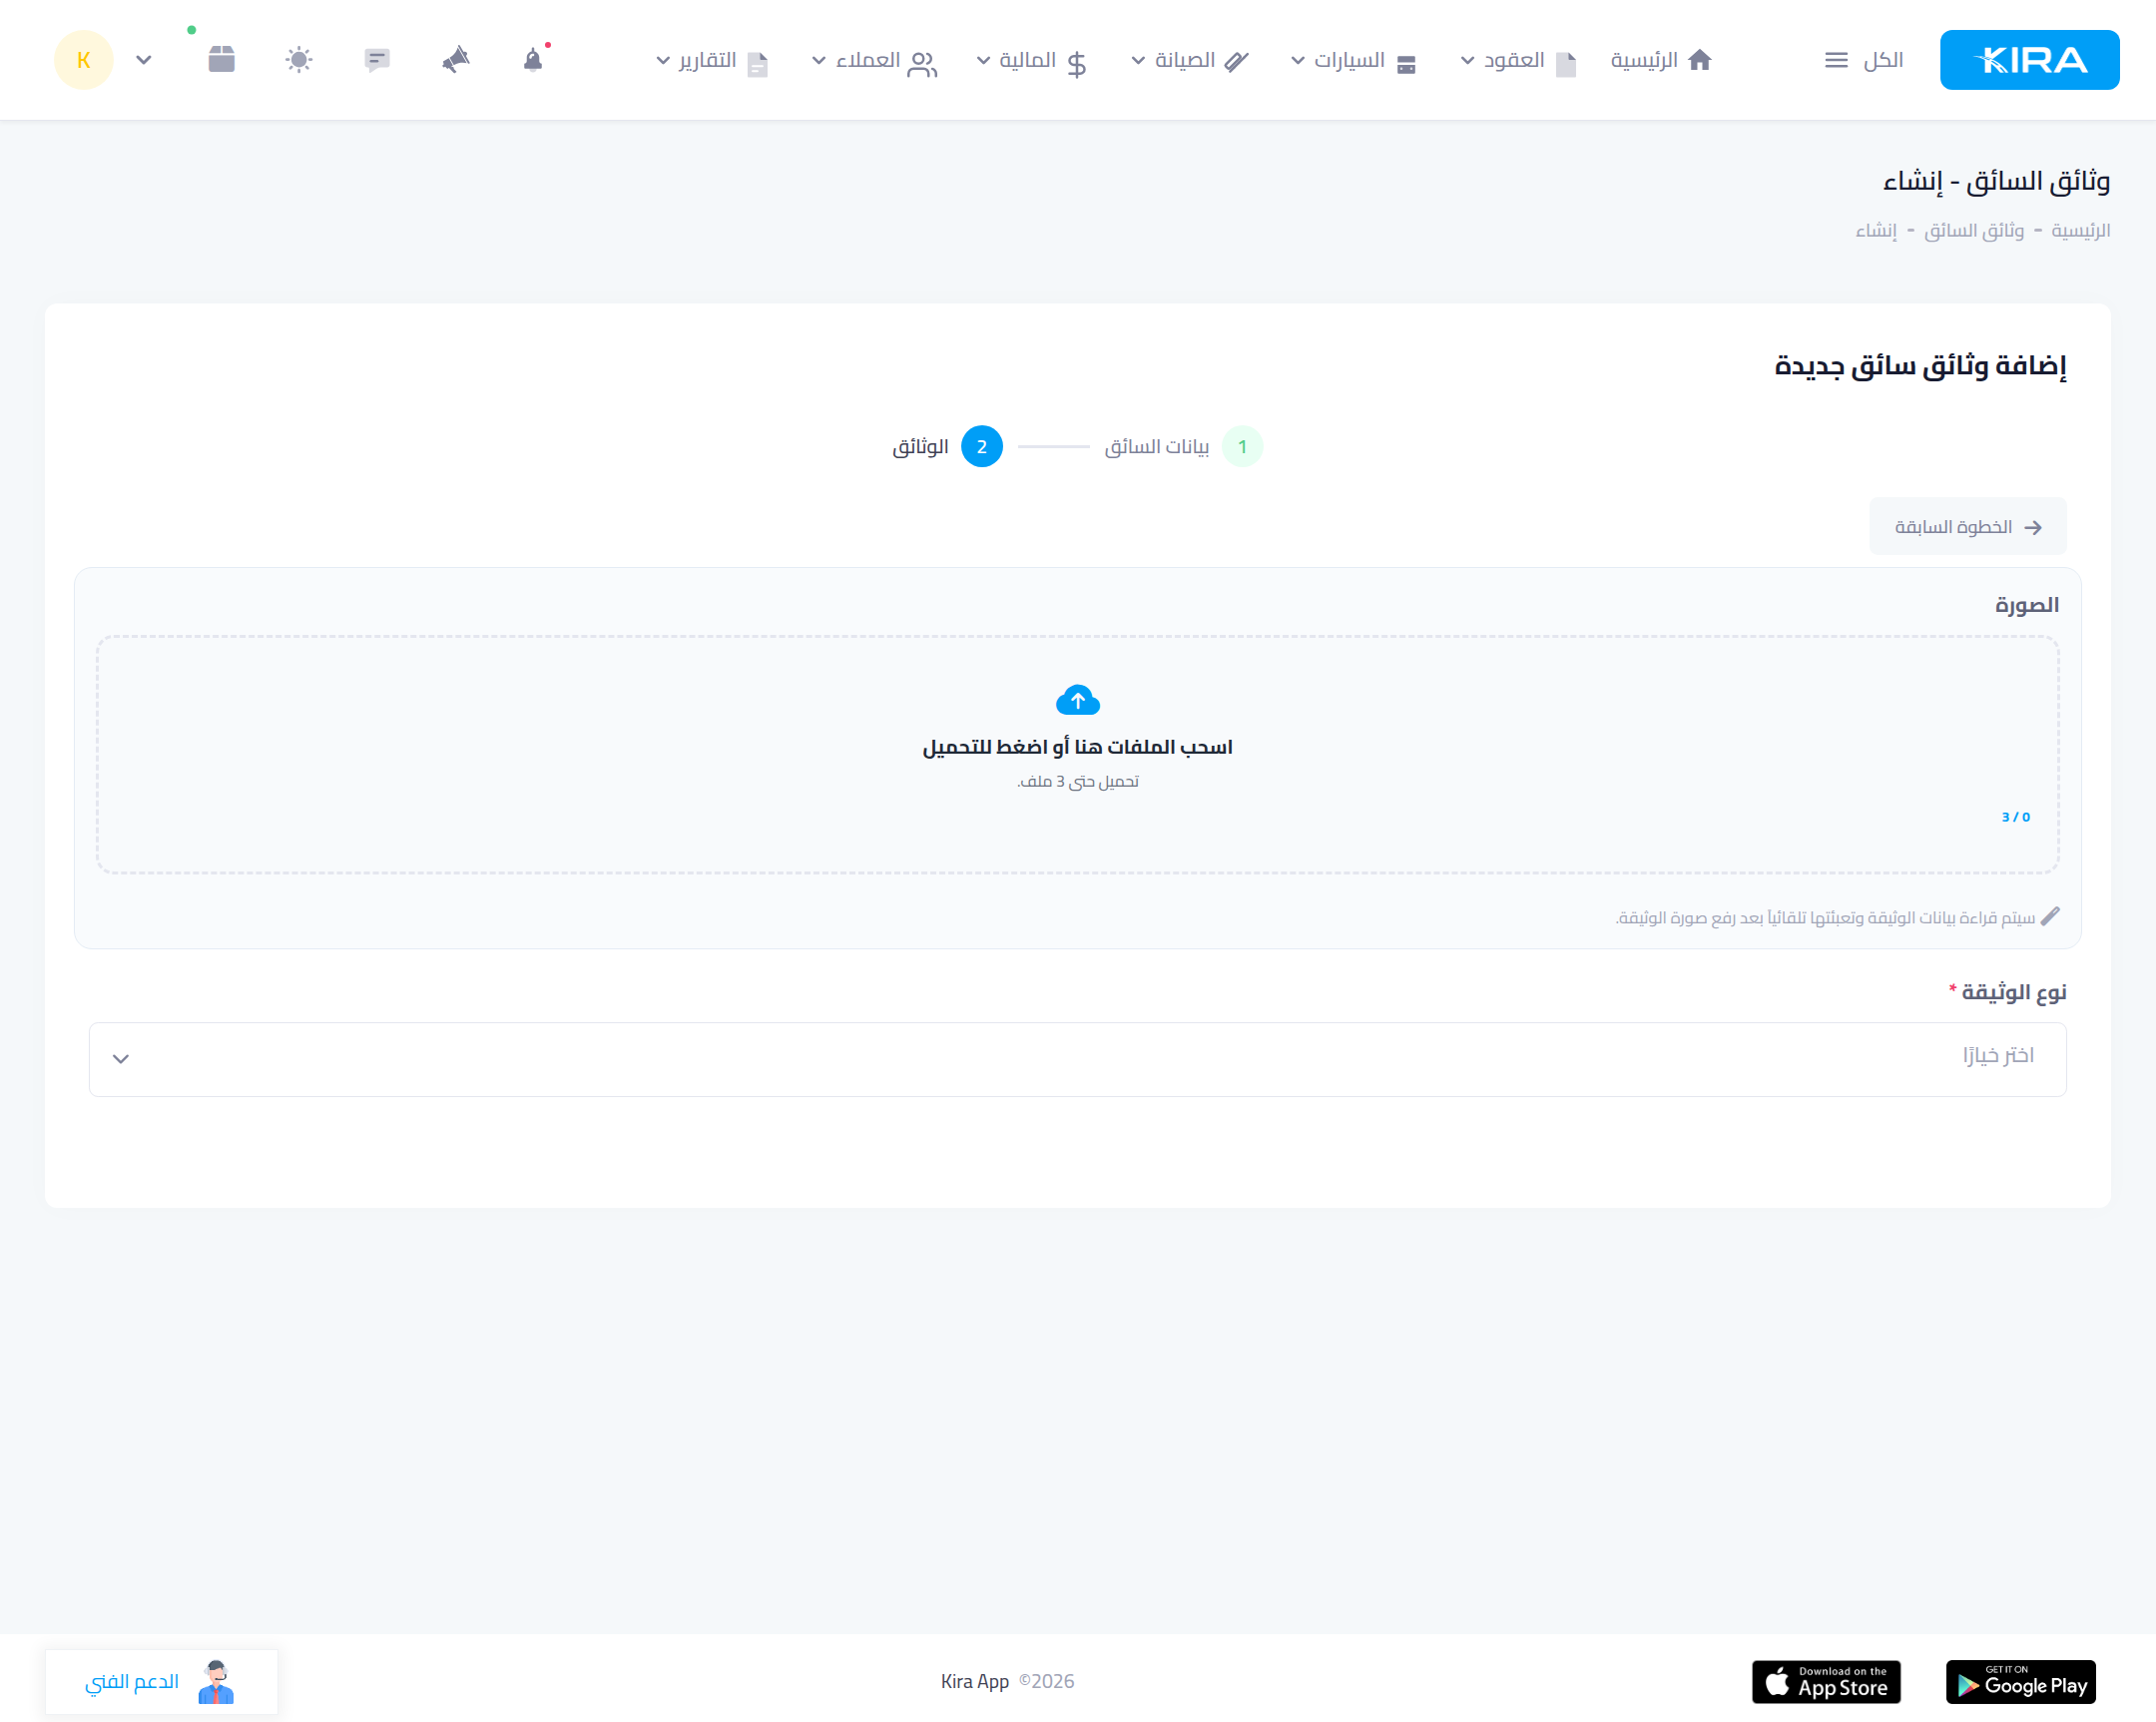
In the “Documents” step, drag the document photo (or a PDF) into the upload zone. The platform reads the document and fills the fields automatically — document number, expiry date and the rest — you only review, pick the “Document type” (national ID, driving licence, passport…) and save. Up to 3 documents can be attached per driver.
Common mistakes
- Wrong country code on the phone: WhatsApp messages and the e-contract link will never reach the customer. Verify the code before saving.
- Skipping the blocklist check: one second saves you a troubled contract with a customer blocked elsewhere.
- A contract with no driver documents: the contract can still be created, but a warning appears and the e-contract will have missing data. Document the driver first.
⬅ Next in the series: Part 2: Create a New Contract with the Wizard