Fleet Guide 1/7 — Add a Car (with Automatic Licence Reading)
The fastest way to enter a car: upload a photo of its licence and the system reads the make, model, plate, VIN and year and fills them in — then you review, set the branch and prices, and save.
🚗 Fleet Guide Series — Part 1 of 7 · Stage: Setup · Full series index
🚗 Guide map — manage your fleet in 7 parts
This series builds your fleet from the ground up: add and price a car, document its insurance and inspection, track its status, log maintenance and its alerts, and manage financing installments. Then rent it out with the contracts guide.
- Add a Car (with Automatic Licence Reading) (Setup)
- Prices and Price Lists (Pricing)
- Car Documents: Insurance, Inspection and Tax (Documents)
- The Cars List and Their Statuses (Operation)
- Maintenance Requests (Maintenance)
- Scheduled-Maintenance Alerts (Maintenance)
- Car Installments (Financing)
Then continue with the Contracts Guide (9 parts).
What you will learn
- Add a car by reading its licence photo automatically (instead of typing).
- Review and set the car's specifications and branch.
- Link the car to a price list and set the minimum rental period.
Before you start
- You need the car-creation permission.
- Preferably you already have at least one branch and a price list (branches in the getting-started guide · prices in the next part).
- Prepare a clear photo of the vehicle licence (or a PDF).
Step 1: Open the add-car form
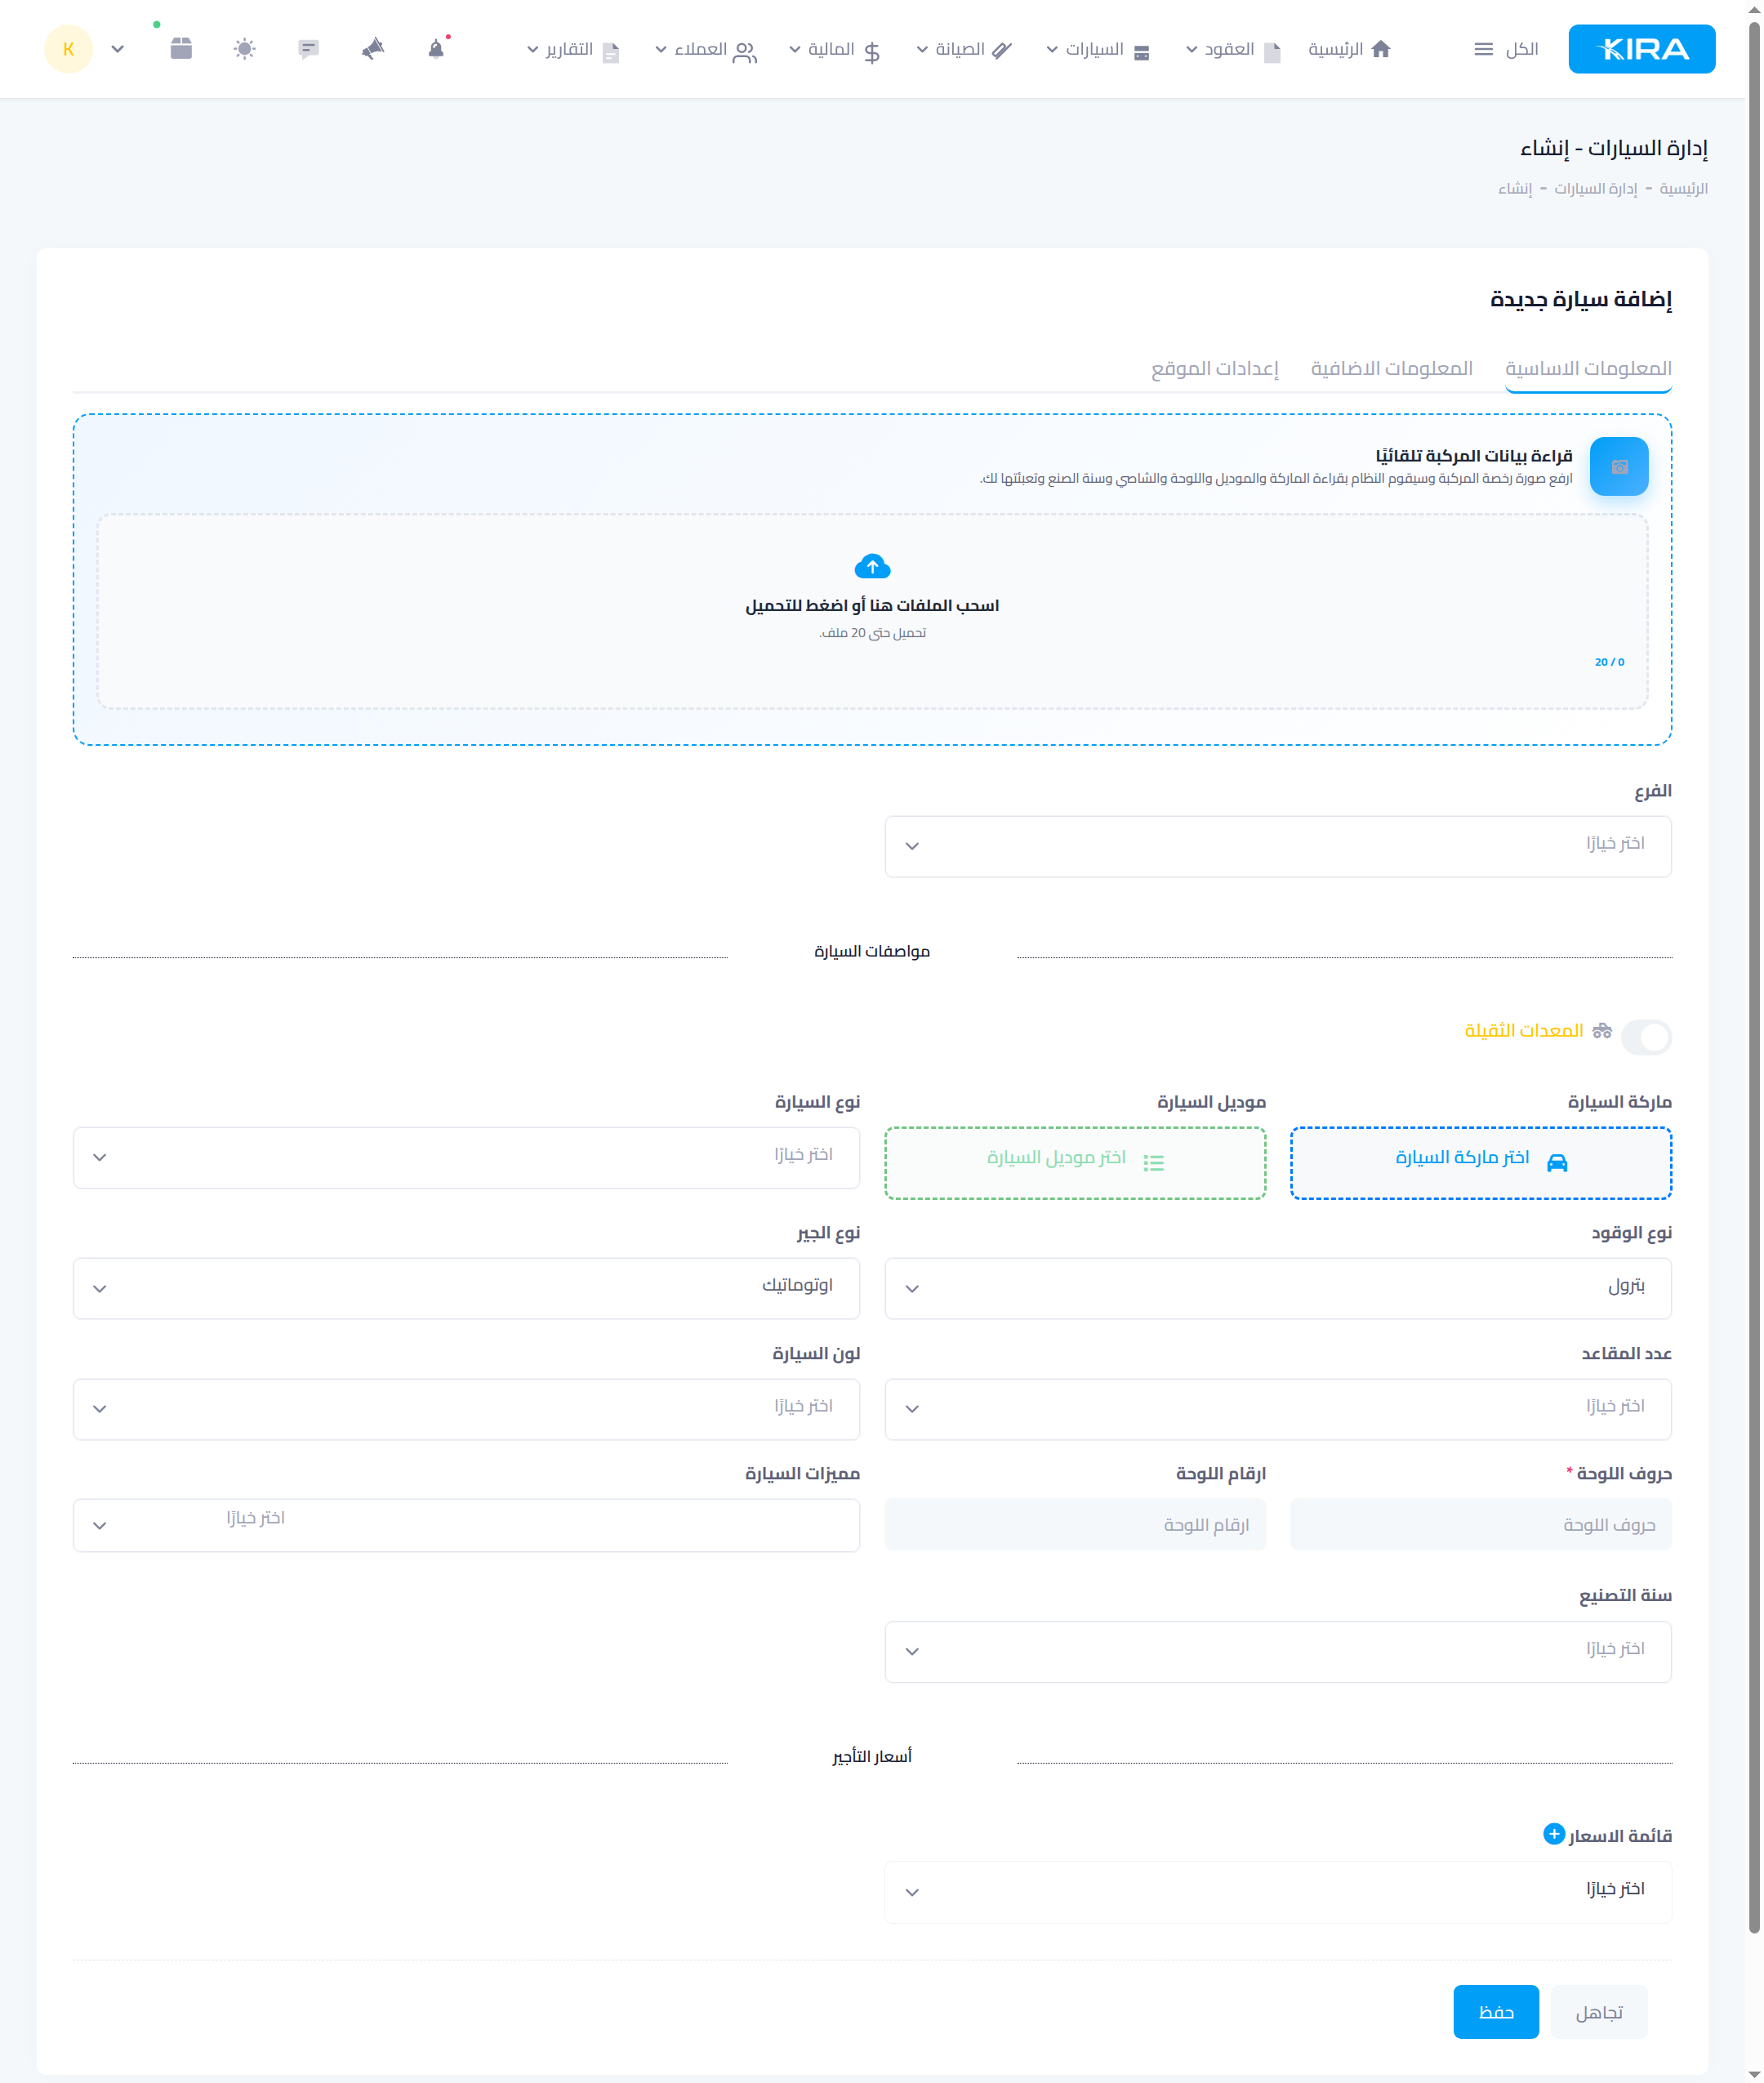
From the “Cars” menu choose “Add car”. The form opens on the “Basic information” tab (followed by “Additional information” and “Location settings”).
Step 2: Read the licence automatically — the fast path
The first card is “Read vehicle data automatically”: drag the licence photo into the upload zone, and reading starts automatically on upload (no button needed). The system reads the make, model, type, colour, plate, VIN and year and fills the fields, then shows a banner: “Fields were filled from the licence image — please review before saving.” Review each field and correct as needed.
Step 3: Complete the specs and branch
Under “Car specifications” confirm: make · model · type · fuel · transmission · seats · colour · plate letters (required) and plate numbers · manufacture year. Pick the “Branch” the car belongs to — every car lives inside a branch (shows in its lists and reports). Turn on the “Heavy equipment” switch only for heavy machinery.
Step 4: Link prices and save
In “Rental prices” link the car to a suitable “Price list” (prices and lists are covered in part 2), and set the minimum accepted rental period. Then press “Save” — the car appears in your fleet list immediately and is available for booking.
Common mistakes
- Trusting the licence read without reviewing: OCR is accurate but assistive — always check the plate and year before saving.
- A car with the wrong branch: it muddles your reports — pick the car's real branch.
- A car with no price list: no price is computed at contract time — link a price list or enter its prices.
⬅ Next in the series: Part 2: Prices and Price Lists