Getting Started 5/6 — Set Up Your Cash Boxes and Bank Accounts
Create your cash box and bank accounts once, link each to its branches and payment methods — and every payment you record lands on the right account balance automatically.
🚀 Getting Started Series — Part 5 of 6 · Stage: Setup · Full series index
What you will learn
- The difference between a cash fund and a bank account.
- Creating an account and linking it to branches and payment methods.
- The default account, transfers log and account statement.
Why set accounts up first?
Every payment you record on a contract (part 5 of the contracts guide) asks: where did the money go? With funds and accounts defined upfront, each movement lands on the right balance instantly — and your KIRA balance matches your real bank statement.
Step 1: Open funds & bank accounts
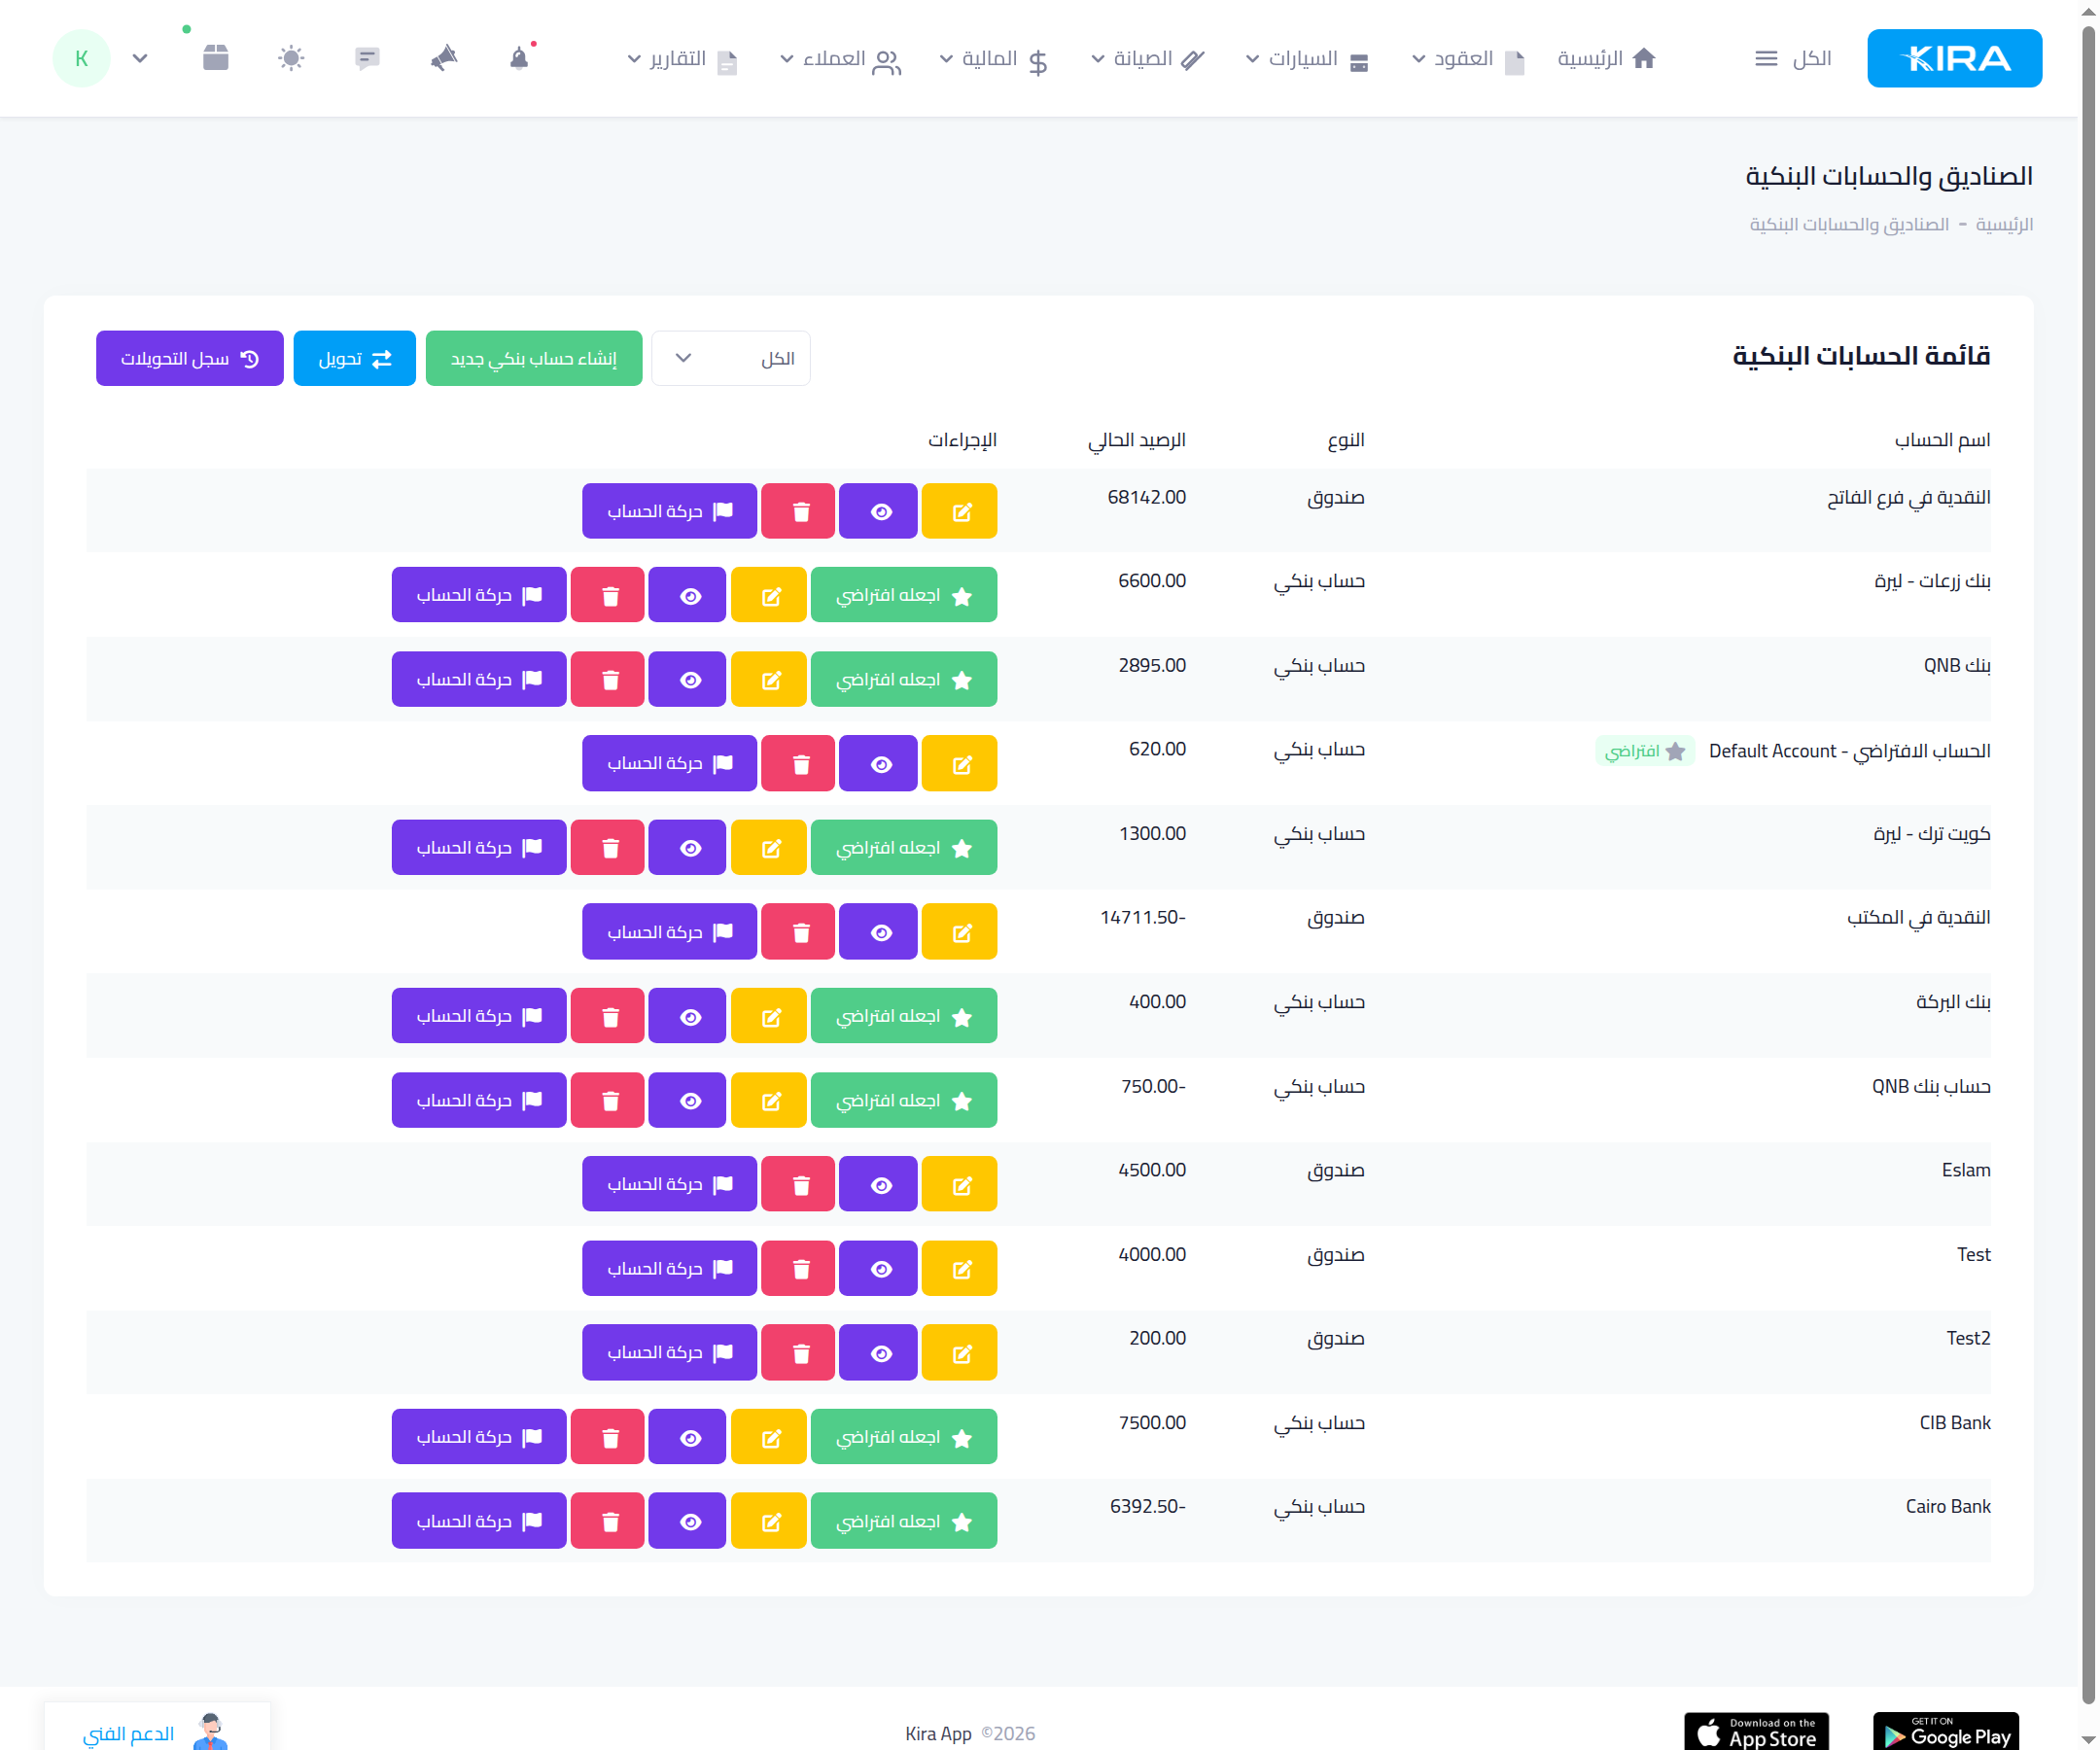
From the “Finance” menu open “Funds & bank accounts”. The list shows each account with its type (fund / bank account) and current balance, plus buttons: account movements (detailed statement), edit, view, and “make default”. On top: “create new bank account”, “transfer” between two accounts, and the “transfers log”.
Step 2: Create the account
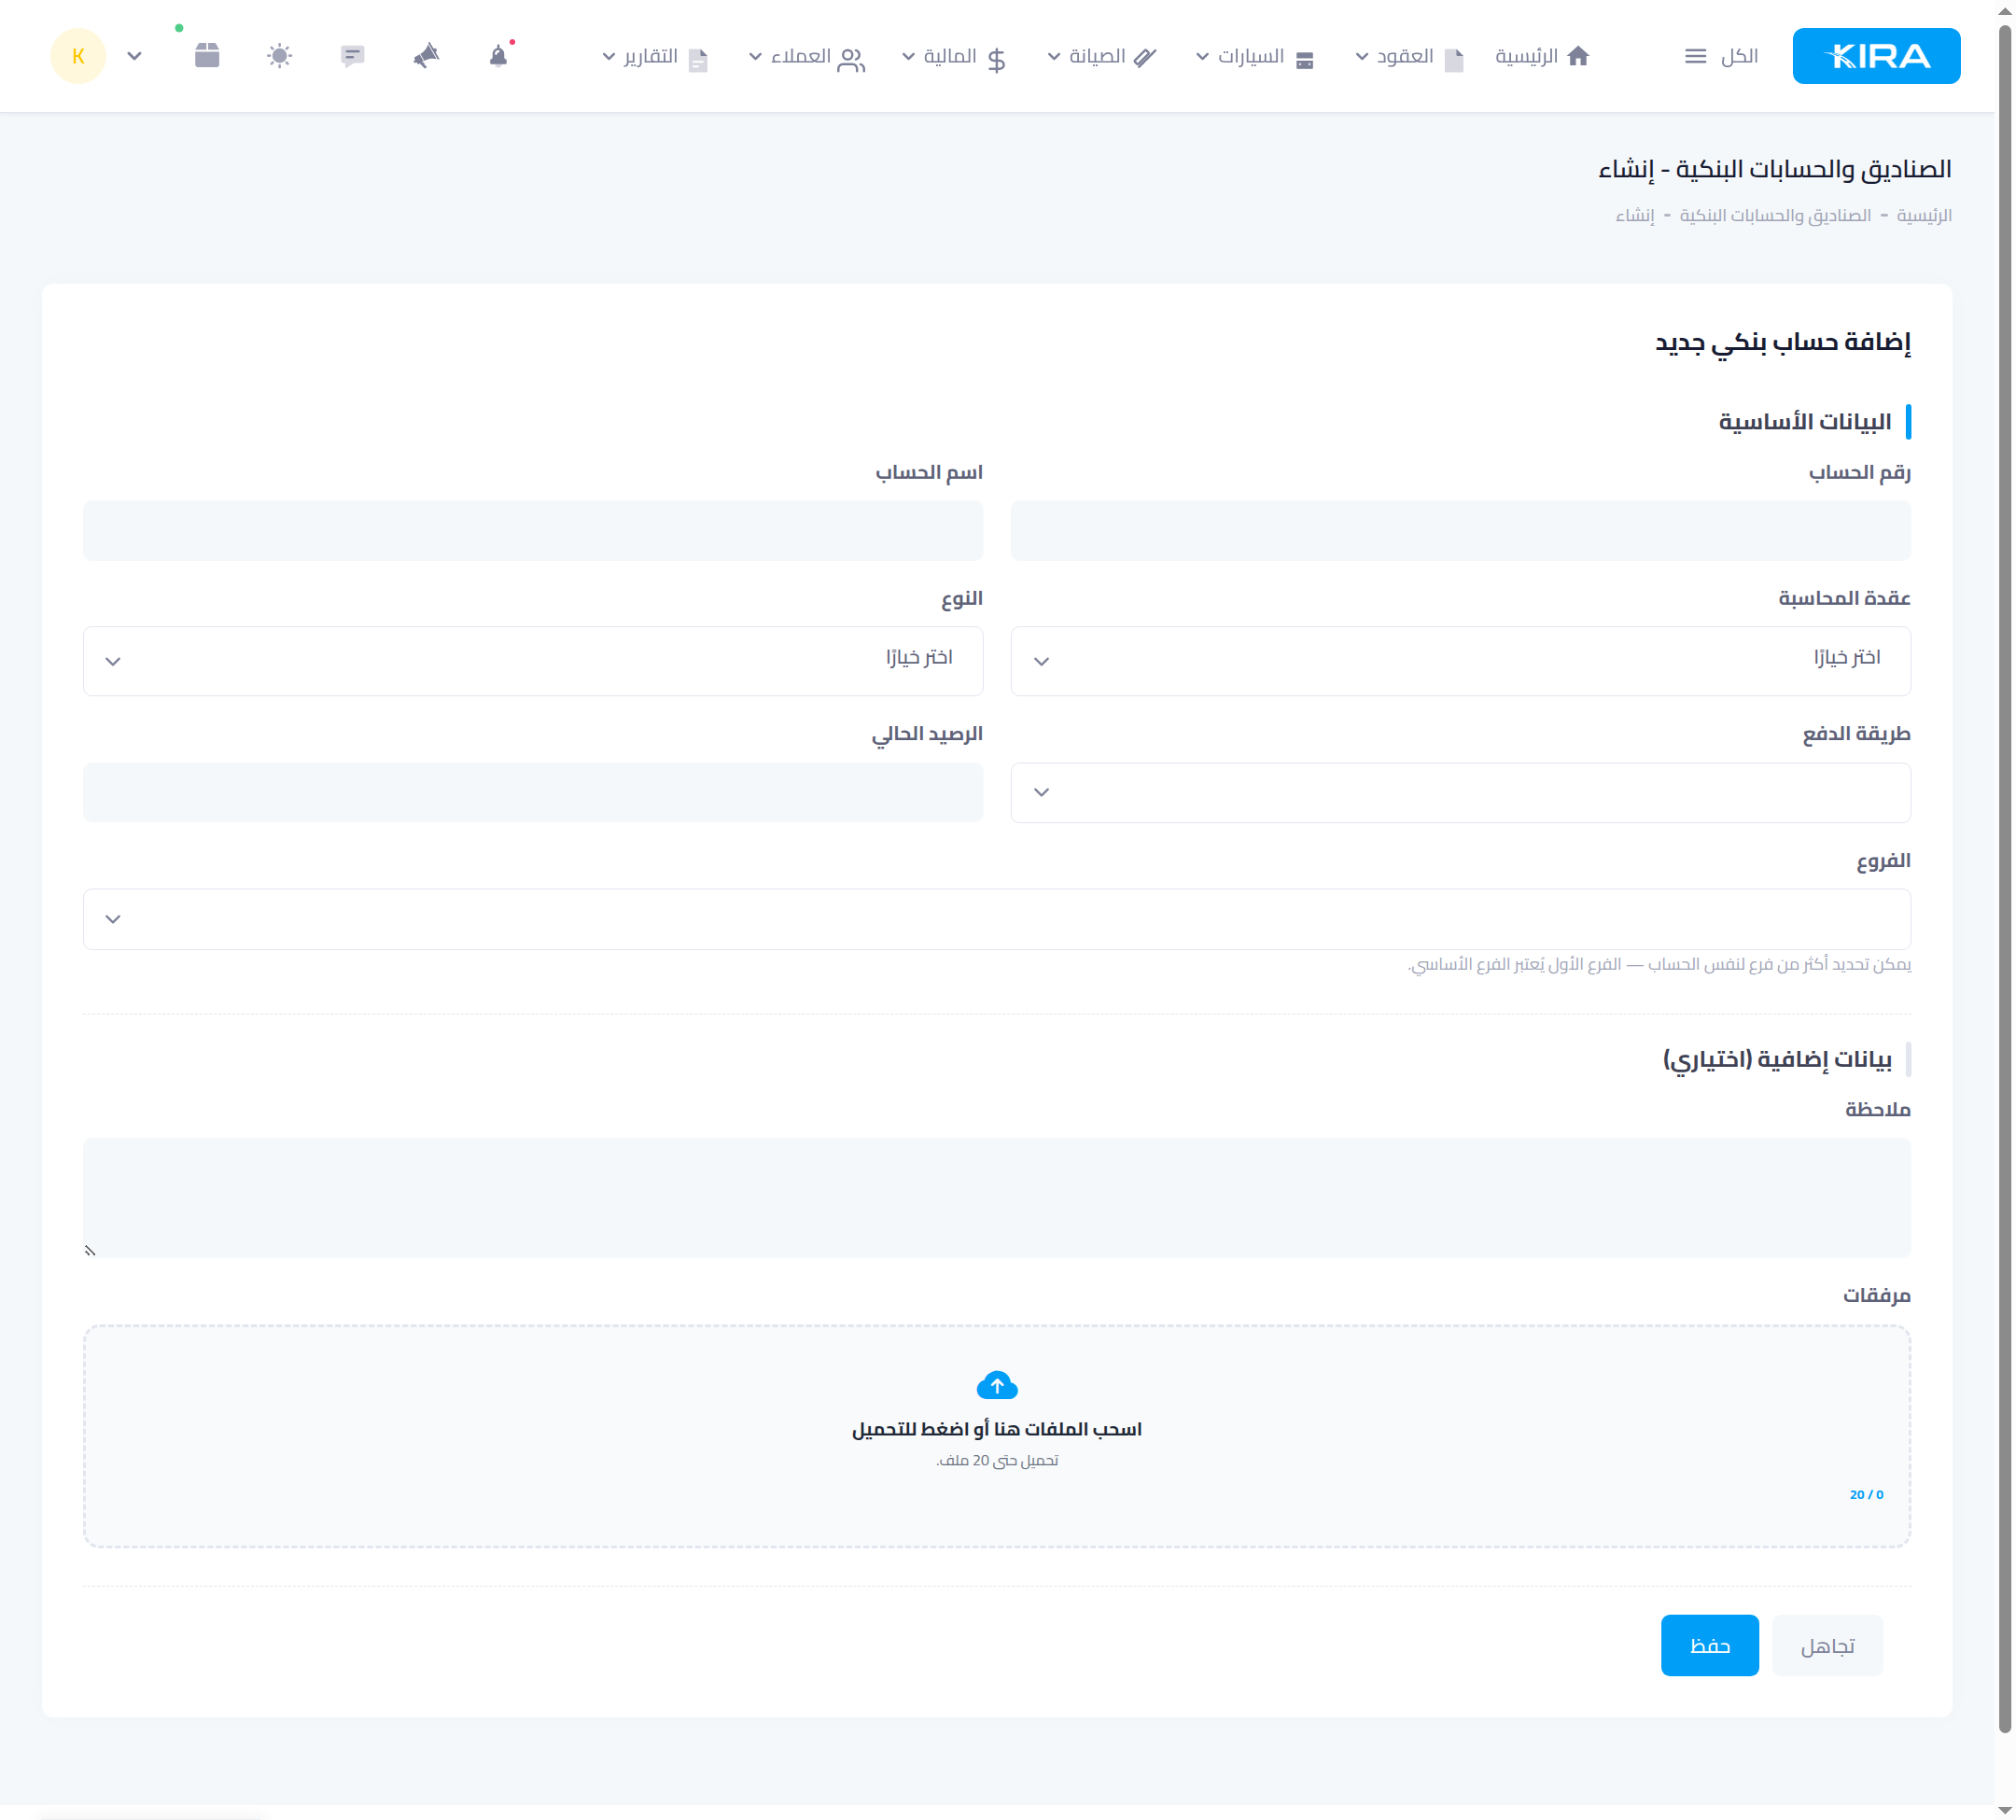
- Account name and account number.
- Type: “fund” for branch cash, or “bank account” for real bank accounts.
- Accounting node: links the account to your chart of accounts (for advanced-accounting users).
- Payment methods: what this account receives — cash, bank transfer, cheque, electronic payment — so it's offered when recording a payment of that method.
- Current balance: the opening balance at creation.
- Branches: an account can serve several branches — the first is primary.
- Optionally: IBAN, SWIFT, a note and attachments.
The default account
Set a default account via “make default” — the platform suggests it automatically when recording payments, and its details appear to customers in WhatsApp payment-request messages.
Common mistakes
- One account for everything: separate cash from bank — a fund per branch and an account per real bank so statements reconcile.
- An unverified opening balance: enter the actual balance at creation; every later movement builds on it.
- Moving money by editing balances manually: use the “transfer” button — it records the movement on both accounts and keeps it in the transfers log.
⬅ Next in the series: Part 6: Your Plan, Subscriptions and Add-ons
Previous: Part 4 — Add Your Staff and Set Their Permissions · Series index