Getting Started 3/6 — Create Your Branches
The branch is KIRA's operating unit: every car, employee and bank account links to one. Add your branches with their map location, and know what to do when you hit your plan's branch limit.
🚀 Getting Started Series — Part 3 of 6 · Stage: Setup · Full series index
What you will learn
- Why branches matter even with a single location.
- Adding a branch with name, phone and map location.
- Understanding your plan's branch limit and expansion options.
Why branches?
Everything in KIRA lives inside a branch: cars are assigned to branches, staff get access to “all branches” or specific ones, bank accounts link to branches, and each branch can even run its own WhatsApp number. Organise branches early and your reports stay clean — you'll read each branch's revenue and net profit separately.
Step 1: Open the branches list
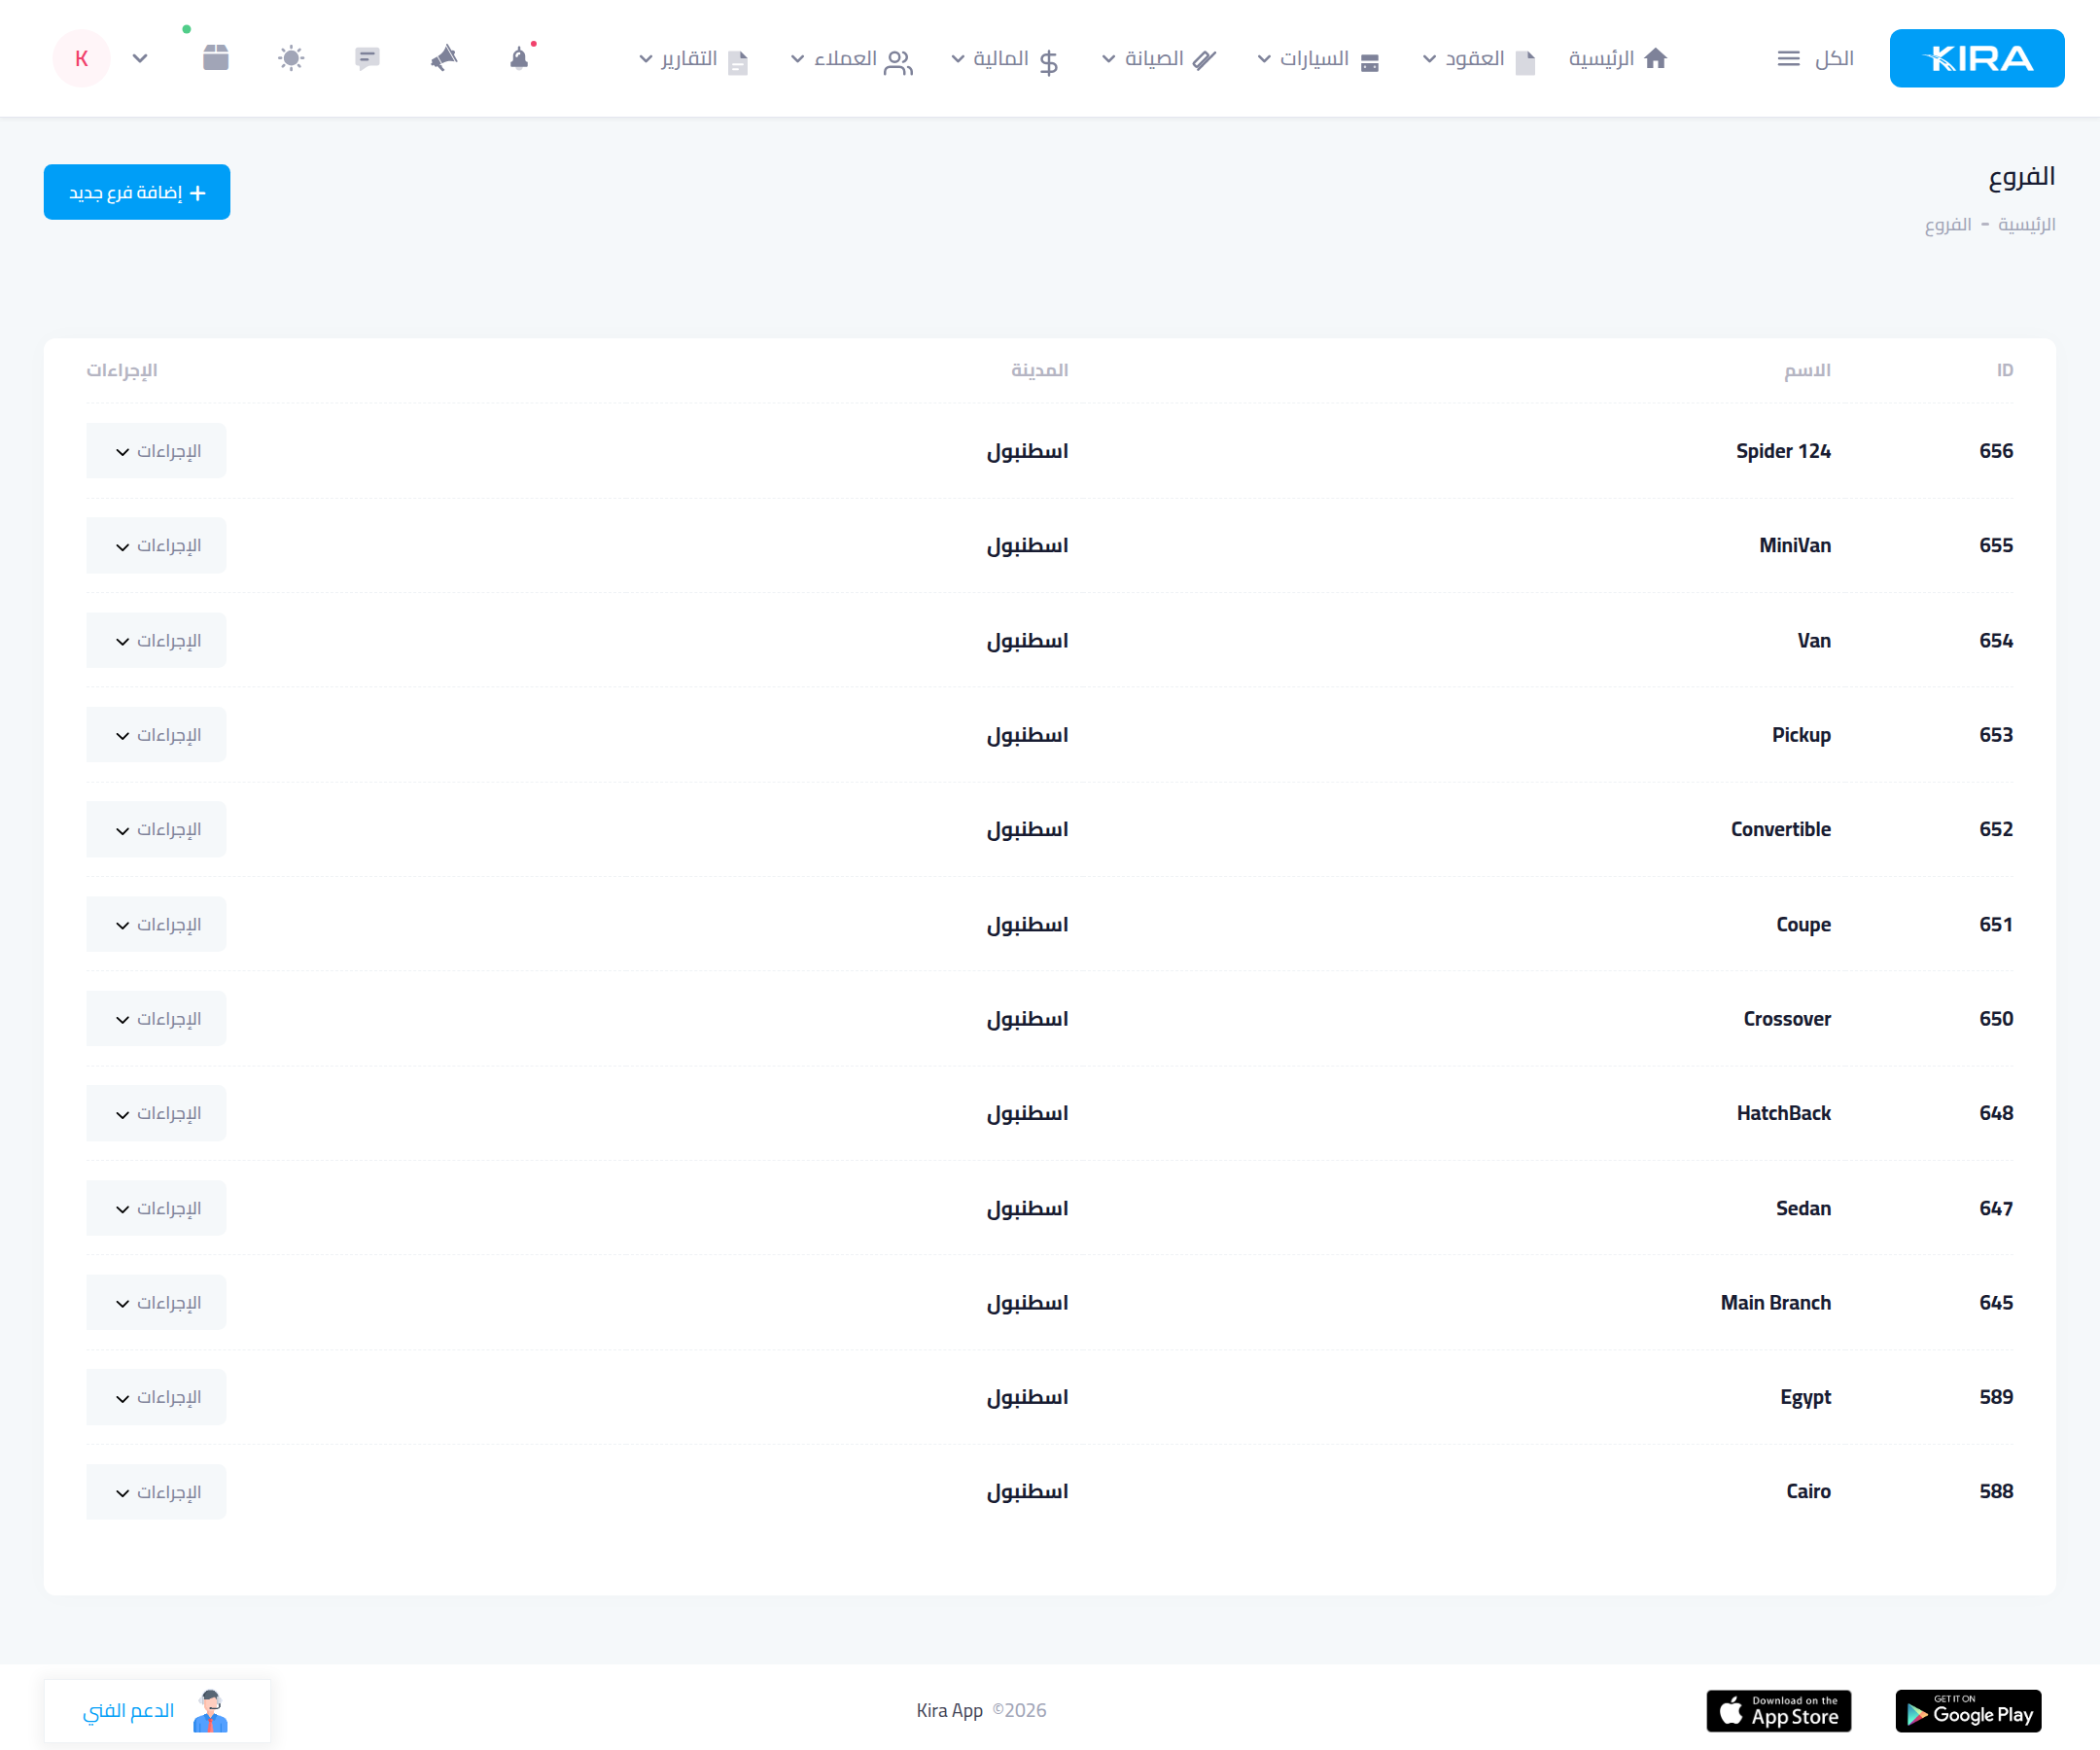
From the menu open “Branches”. The list shows your branches by name and city, with an “Add new branch” button on top.
Step 2: Add the branch
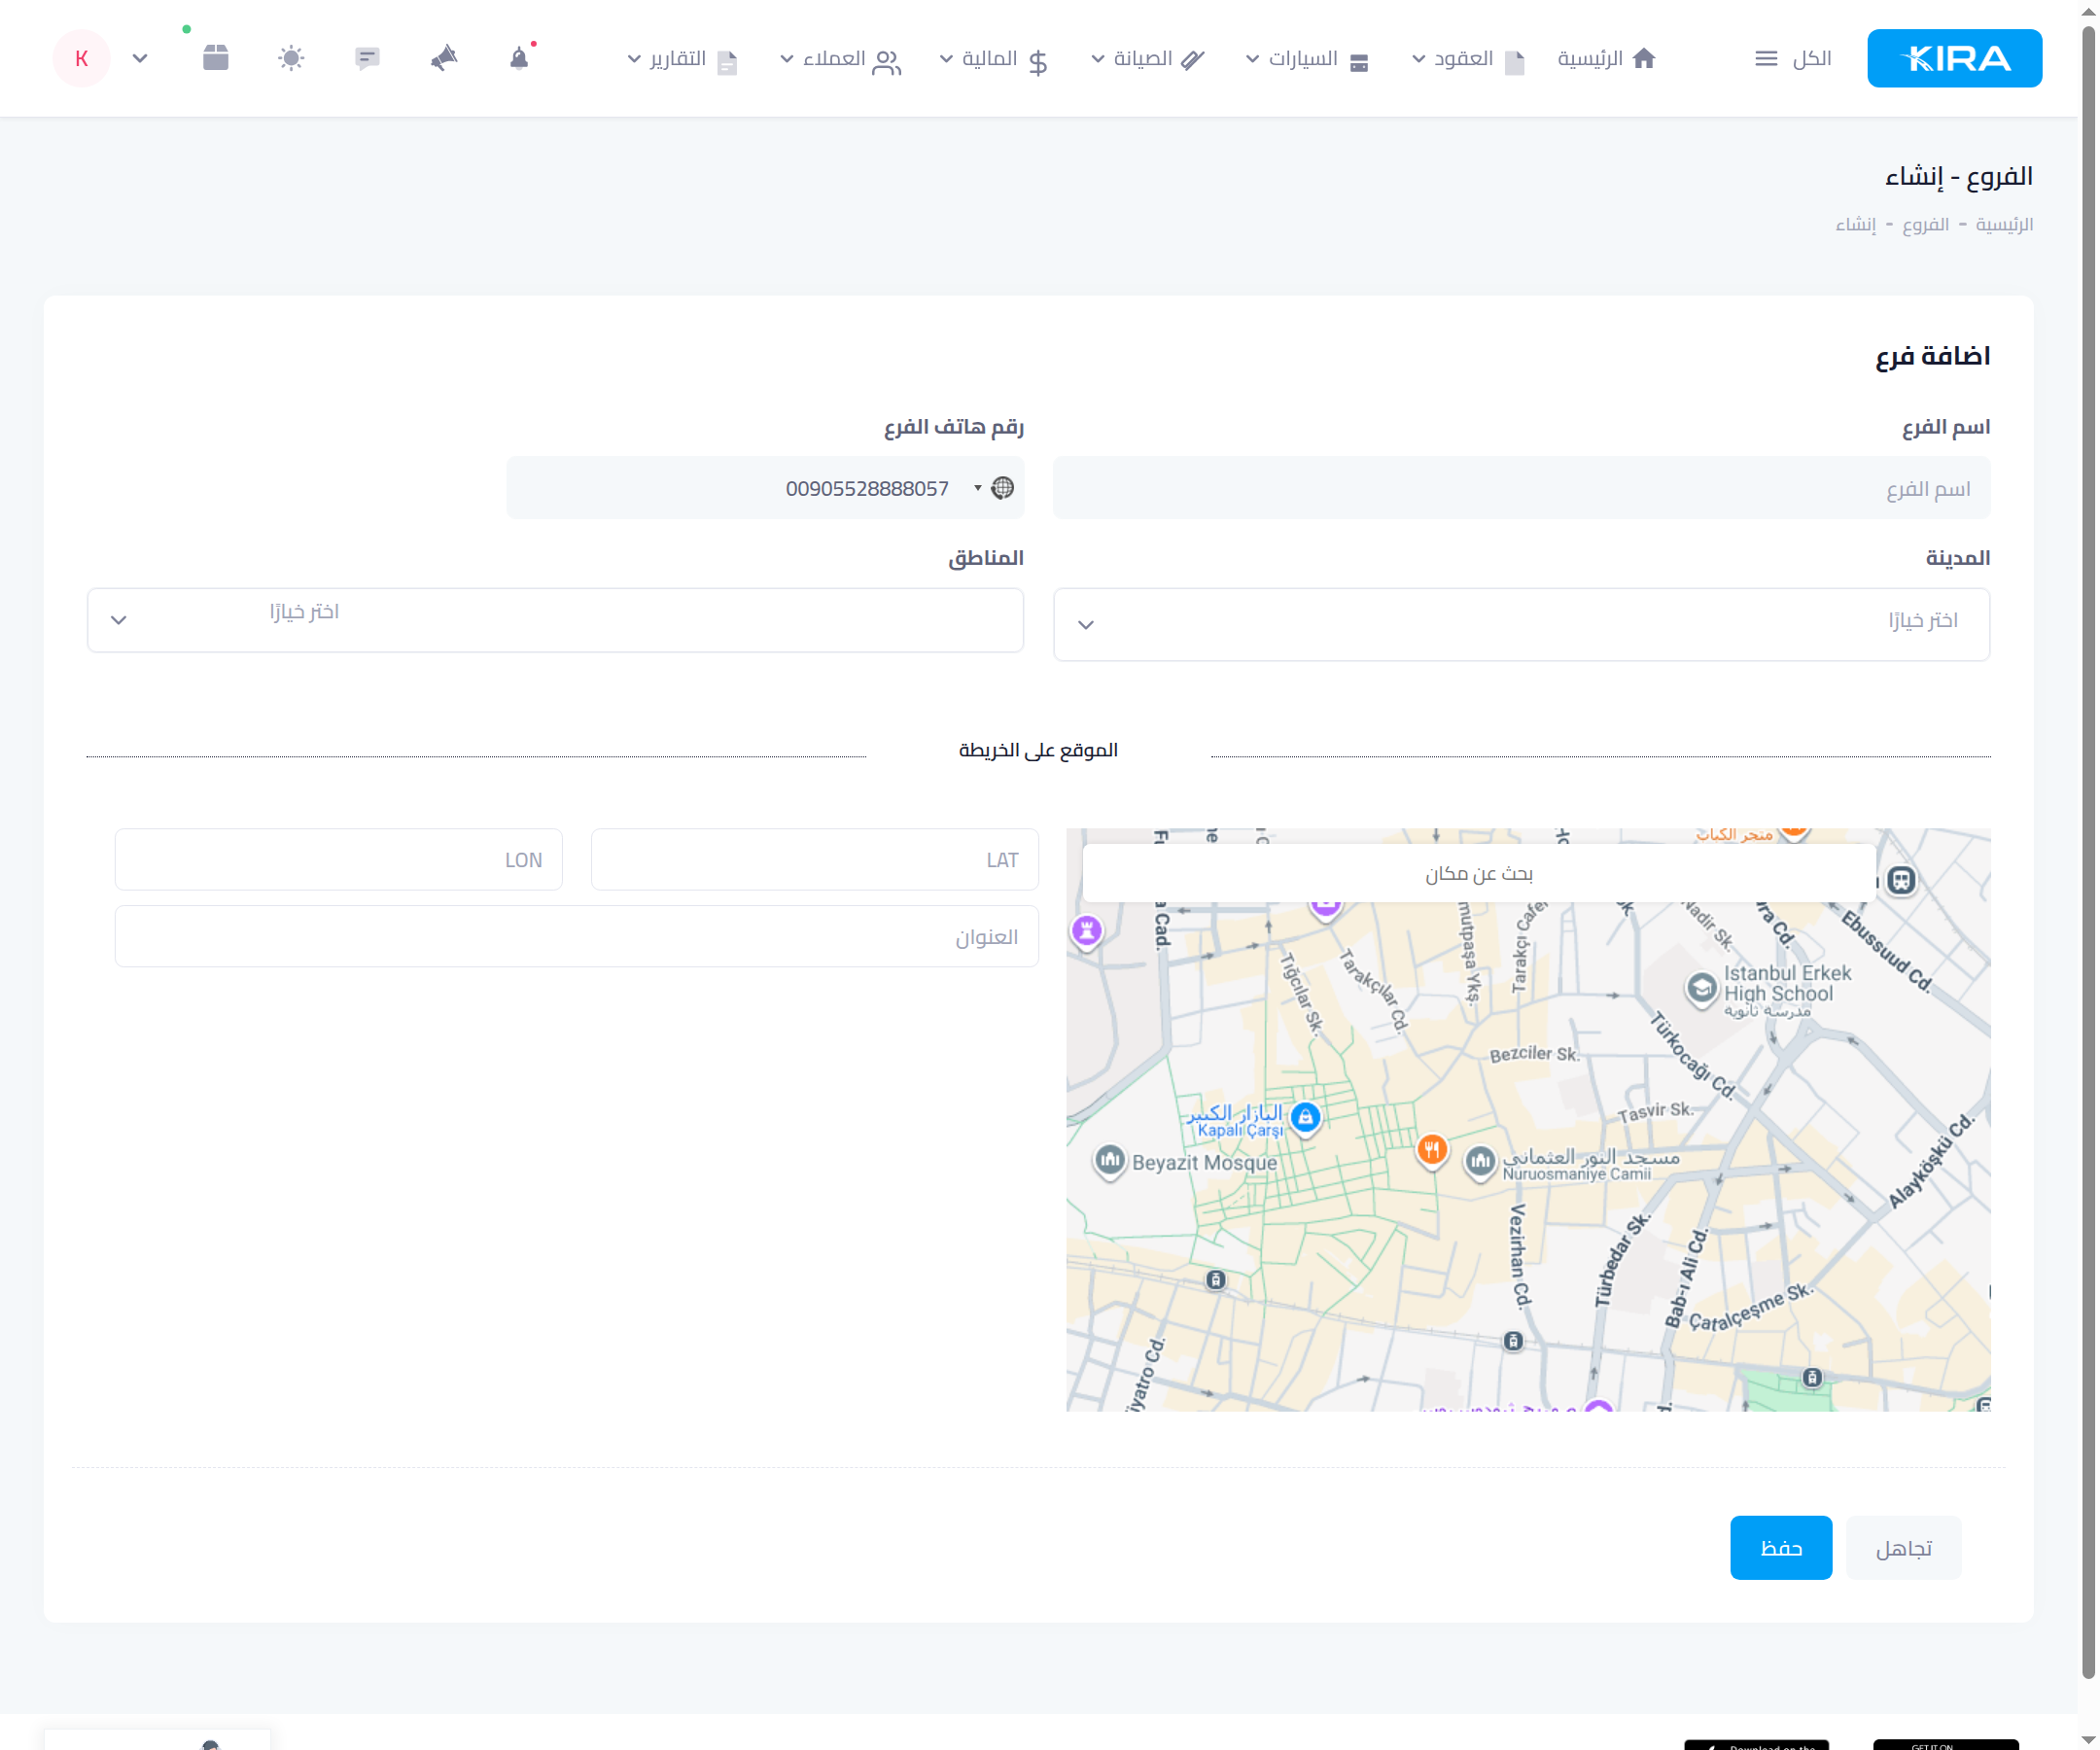
- Branch name: something your staff recognise (“Airport branch”, “Al Khuwair branch”).
- Branch phone with the country code — shown to customers in this branch's messages.
- City and the areas it serves.
- Map location: drop the pin on the actual site — used for delivery and booking pages.
Then “Save”.
The plan's branch limit
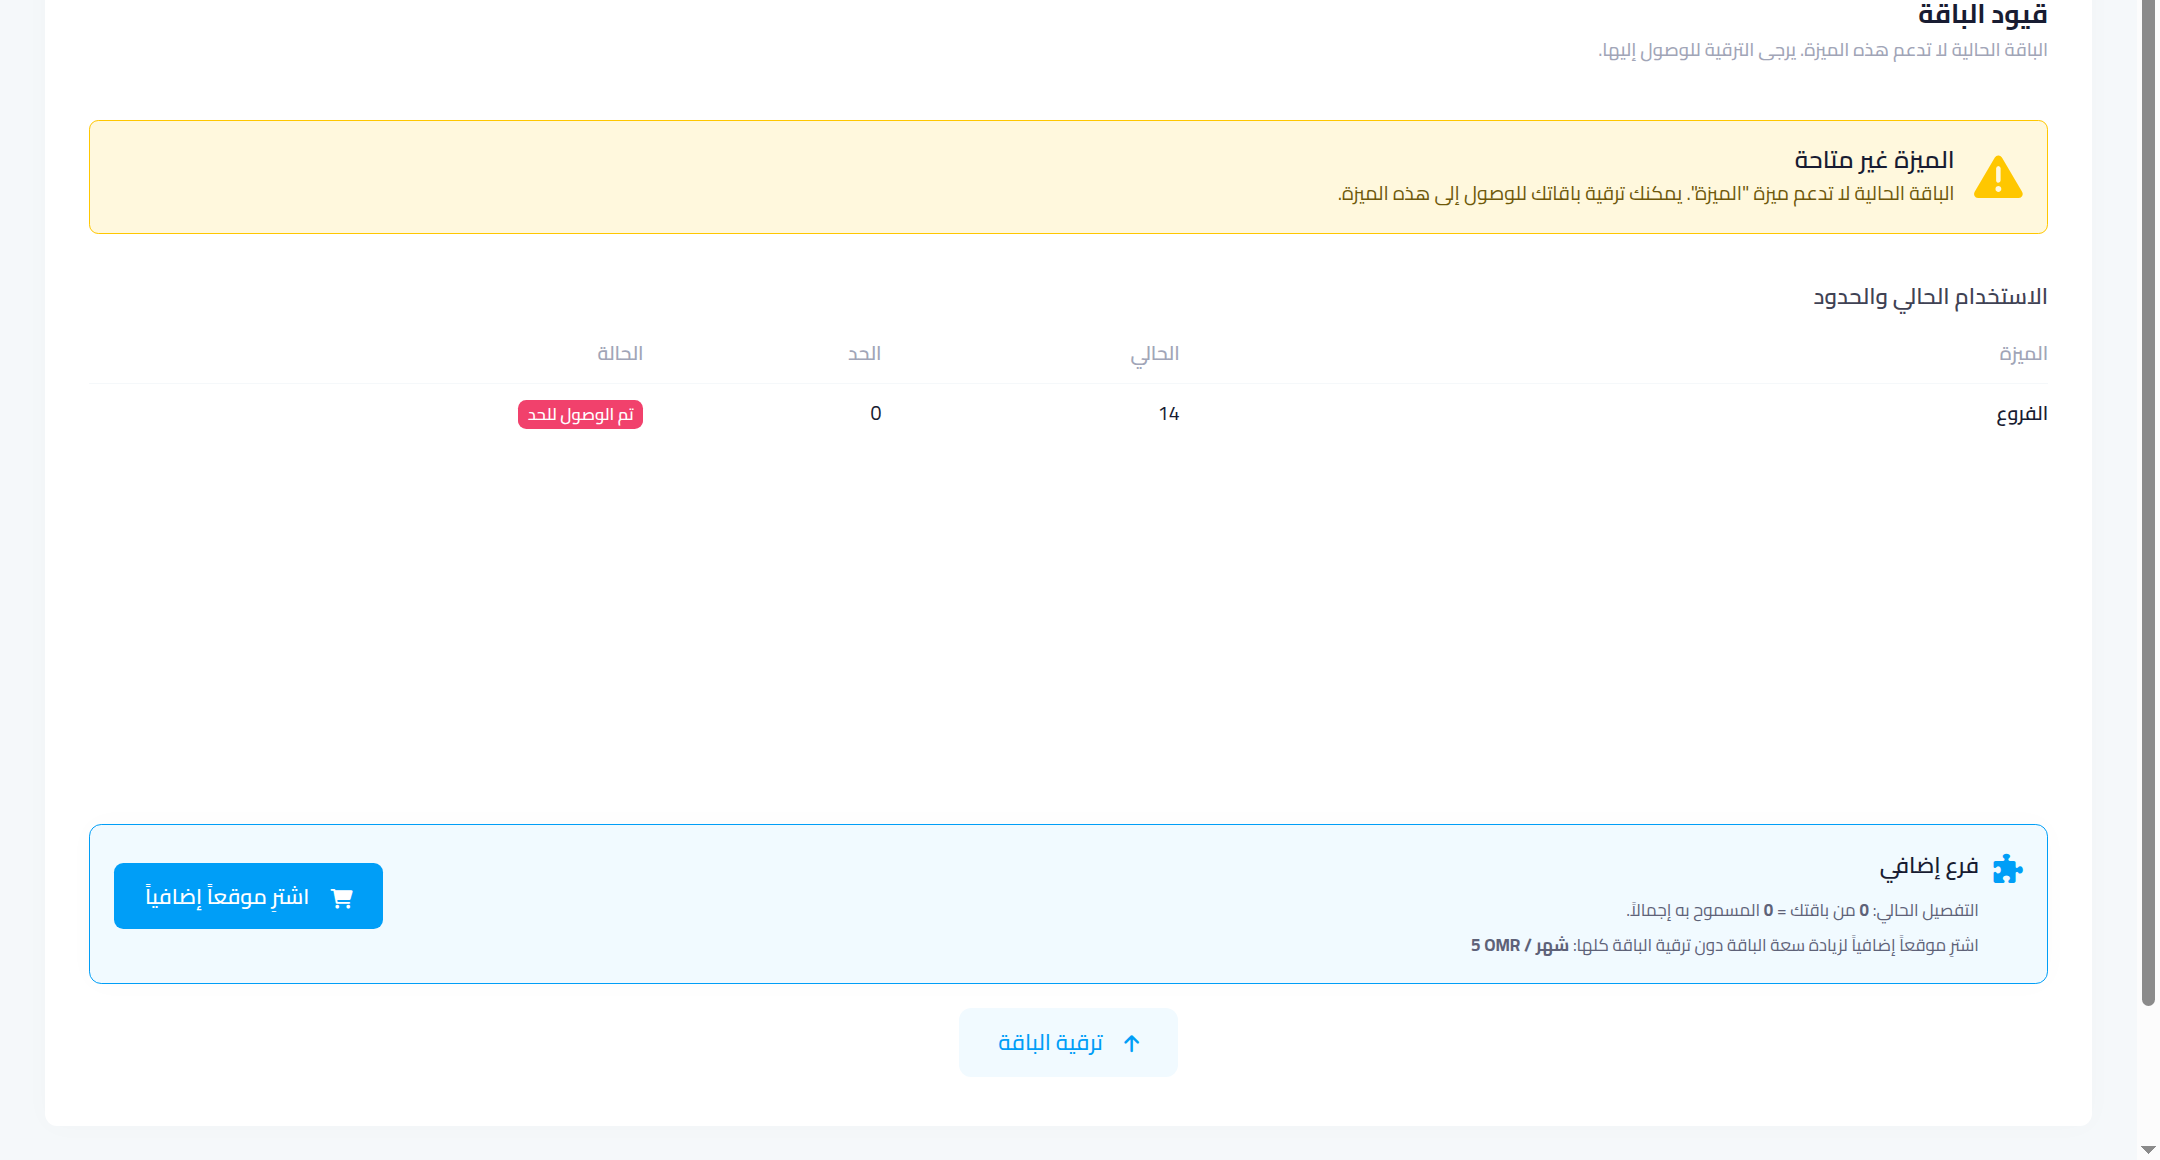
Each plan allows a set number of branches. At the limit, the “package limits” page appears with a “current usage and limits” table and two options:
- Extra branch: buy one extra branch slot without changing plans.
- Upgrade the plan: move to a higher plan with wider limits (see part 6).
Common mistakes
- One branch for multiple real locations: mixes your cars and reports — create a branch per physical site.
- An approximate map pin: place it on the exact address; customers use it to reach you.
⬅ Next in the series: Part 4: Add Your Staff and Set Their Permissions
Previous: Part 2 — Your Company Identity and Settings · Series index