Advanced Accounting Guide 5/8 — Creating & Managing Journal Entries
A complete guide to KIRA's journal entries page: creating balanced entries step by step, the entry lifecycle from draft to posted, and correcting posted entries via reversal.
📚 Advanced Accounting Guide — Part 5 of 8 · Stage: Daily Work & Review · Full series index
The journal entry is the basic building block of KIRA's advanced accounting system. Every financial transaction — whether recorded manually or generated automatically from your operations — ultimately becomes a balanced double-sided entry that feeds your accounting reports. In this article you will learn about the journal entries page, its indicators and filters, the entry creation form step by step, and the full entry lifecycle: from an editable draft, to a final posted entry, and how to correct one when needed using "Reverse entry".
To reach the page, go to: Finance ← Advanced Accounting ← Journal Entries.
Overview of the journal entries page
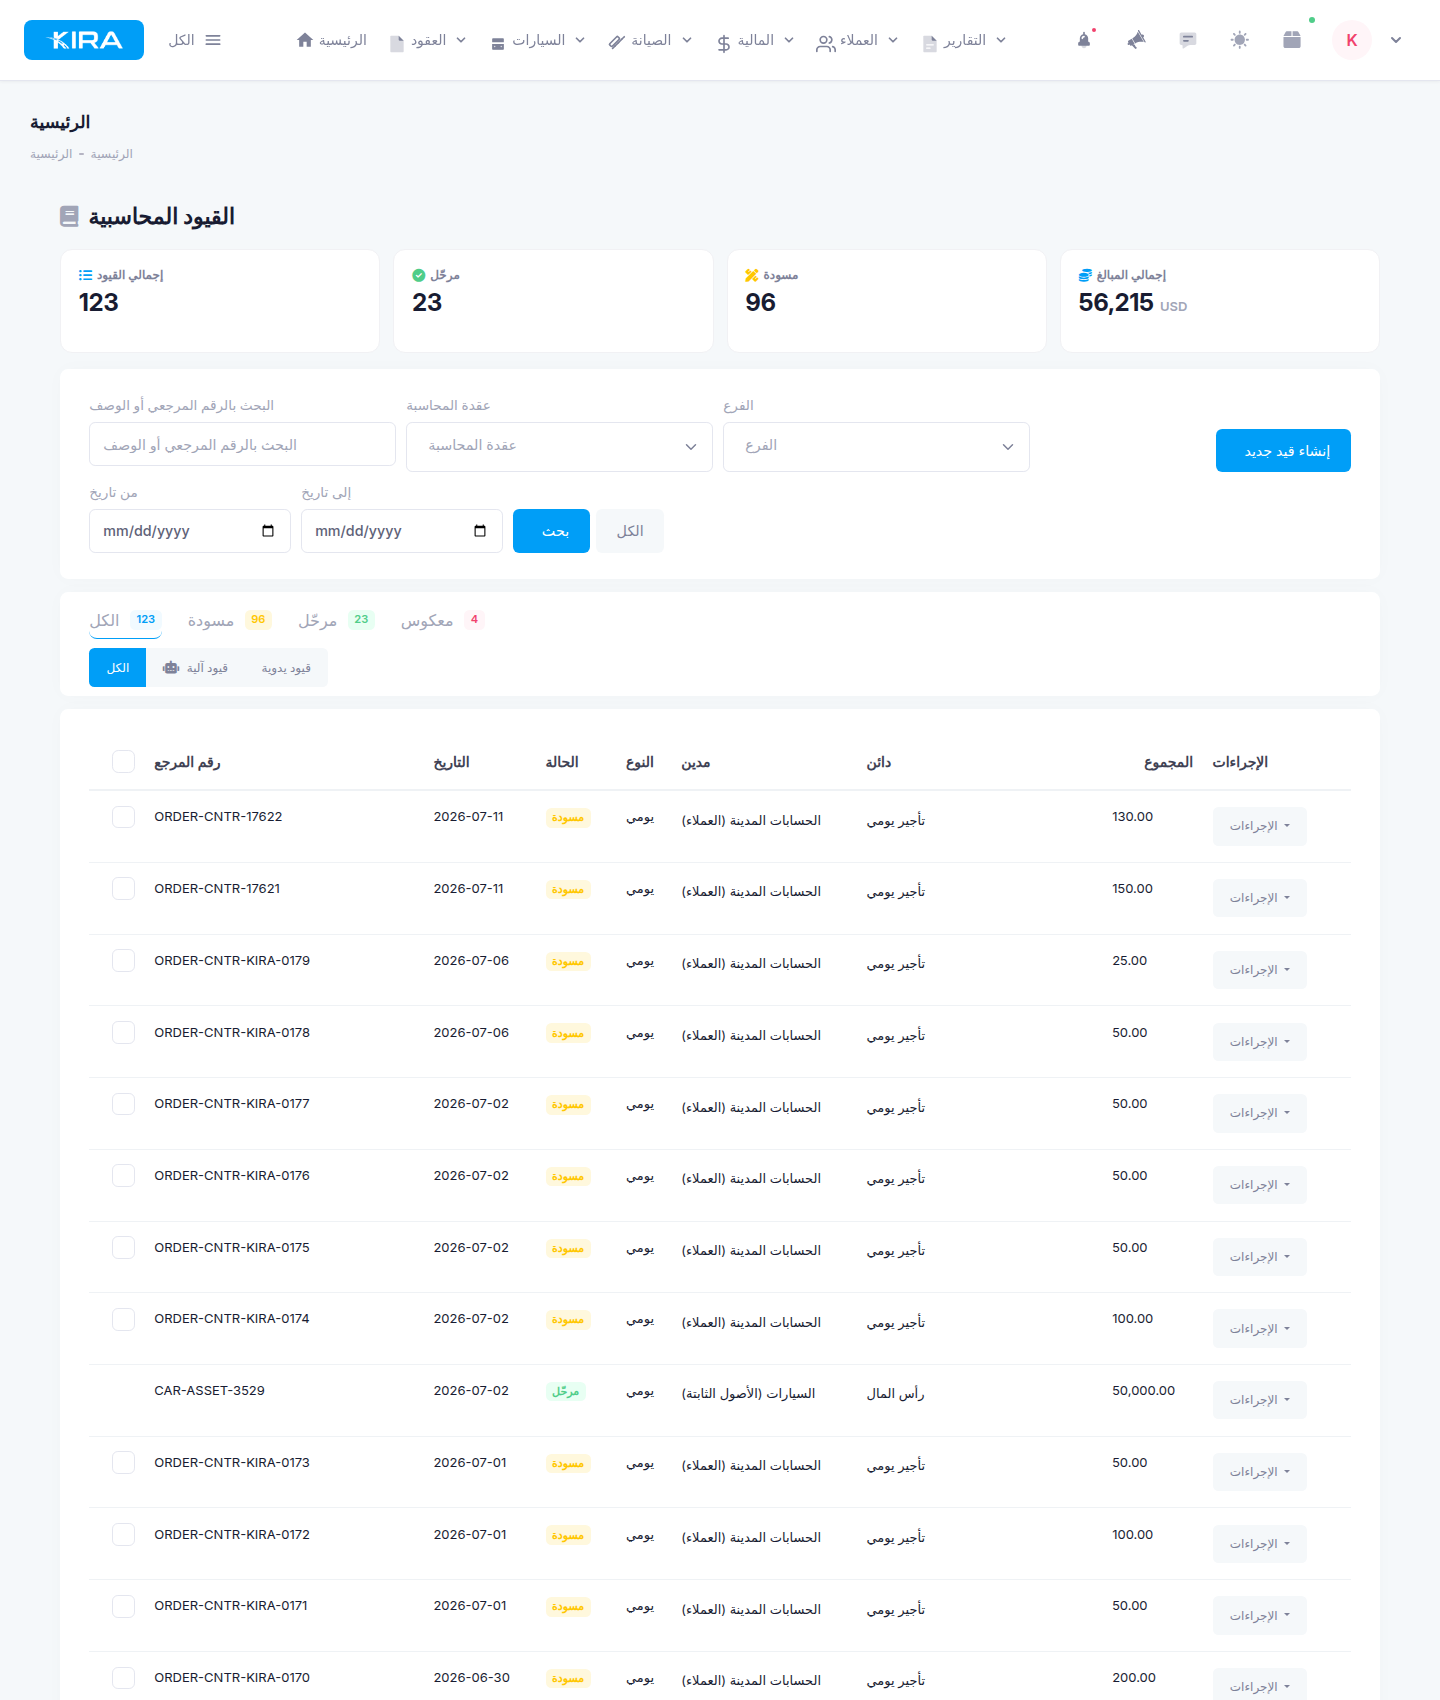
The journal entries page: summary indicators at the top, then filters and status tabs, with the entries table and its per-row Actions menu below.
At the top, four quick indicators summarize your ledger: Total entries, Posted, Draft, and Total amounts — an instant read of how many entries are final in your reports and how many still await review.
Below the indicators you will find filtering tools:
- Search by reference number or description.
- Accounting node (account): show entries touching a specific account from the chart of accounts.
- Branch: limit entries to a specific branch.
- From/To date: define a time period.
The page also organizes entries through two levels of tabs:
- Status tabs: All / Draft / Posted / Reversed.
- Entry source tab: All / Automatic entries / Manual entries.
The table shows, per row: reference number, date, status, type, debit, credit, total, plus an Actions menu whose options depend on the entry's status. To create a new entry, click "Create new entry" at the top of the page.
Creating a new entry — practical steps
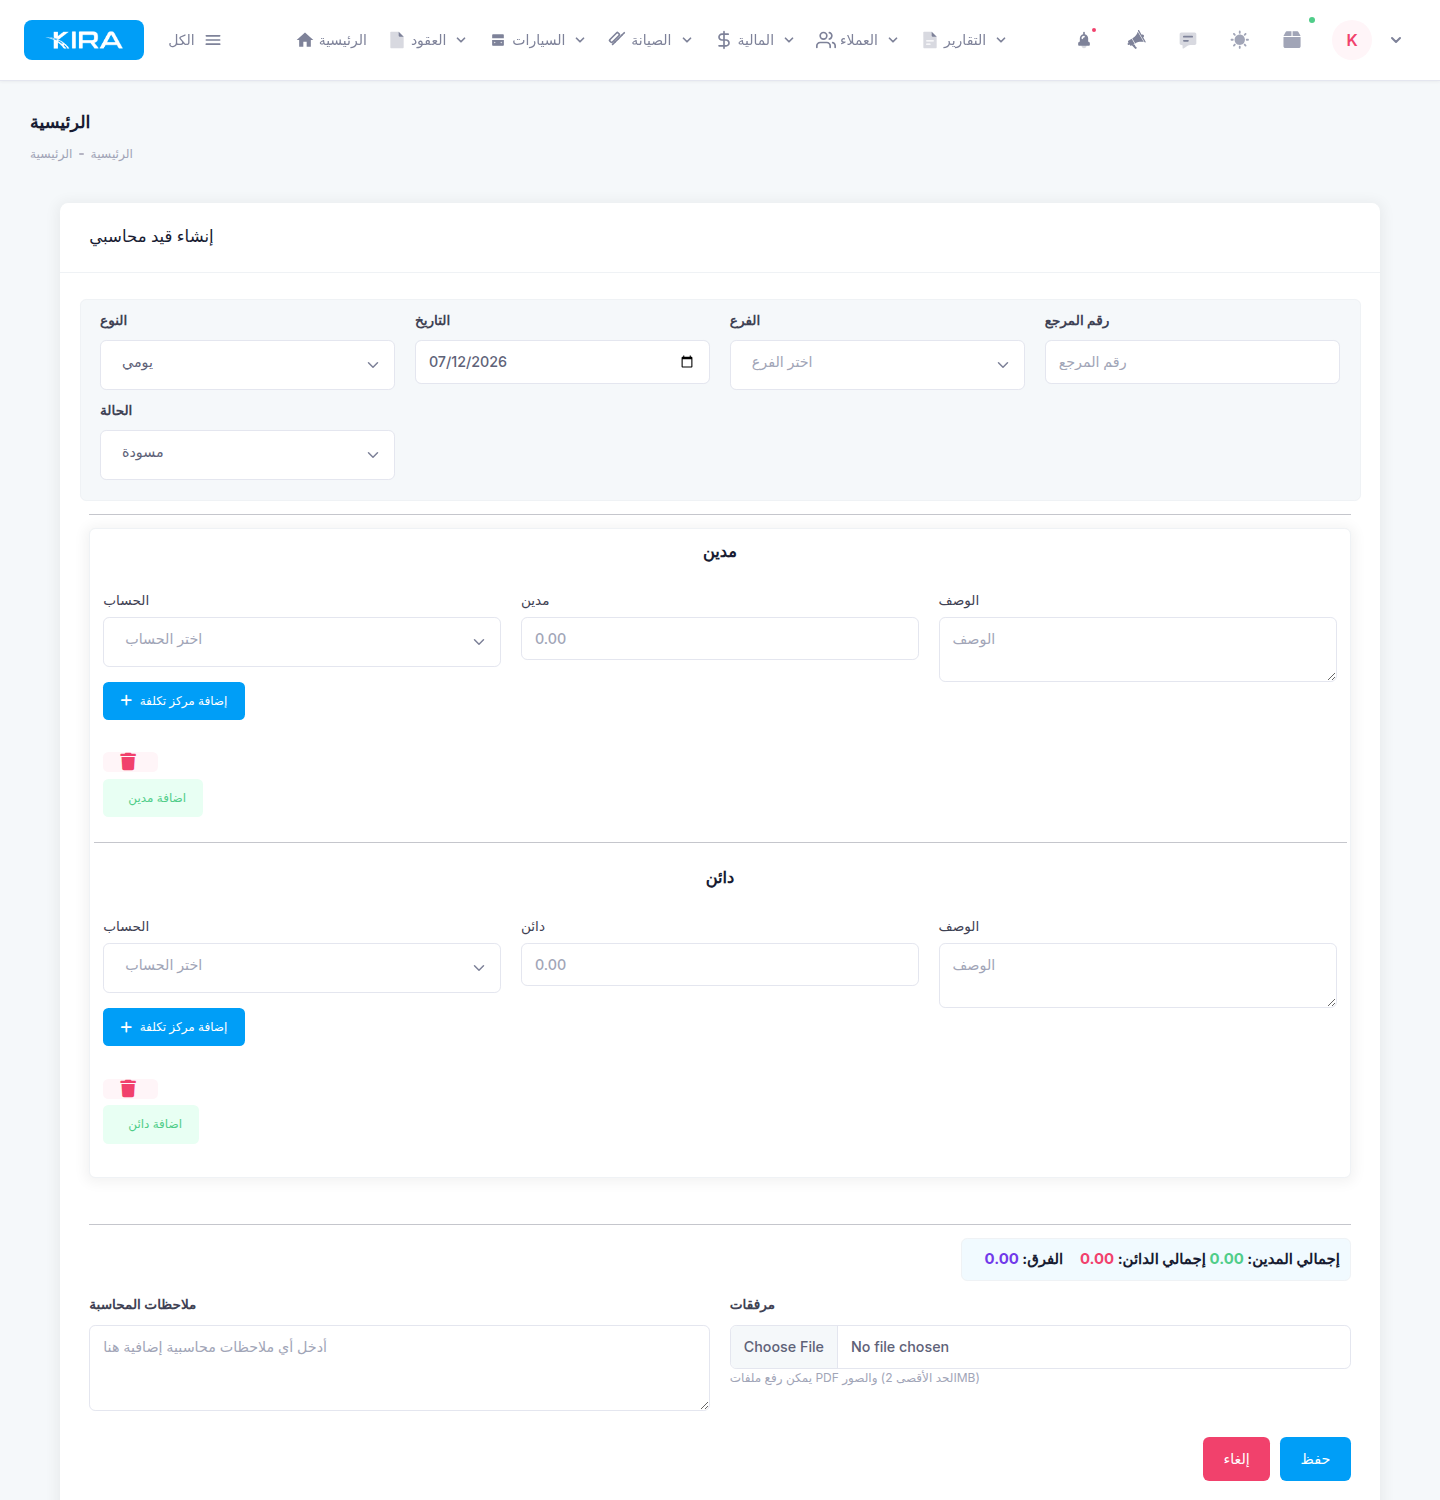
The entry creation form: basic entry details, the Debit and Credit sections with multiple lines, and the totals bar which must show a zero difference.
- From the journal entries page, click "Create new entry".
- Set the Type: "Daily" for ongoing transactions, or "Opening" for opening balances.
- Enter the Date and choose the Branch.
- Enter the Reference number — it is unique and cannot repeat across entries, so adopt a clear numbering pattern.
- Set the Status the entry will be saved with.
- In the Debit section: for each line choose the account from the chart of accounts and enter the amount and description. Add multiple lines via "Add debit", and optionally assign a cost center per line.
- Repeat the same in the Credit section via "Add credit" — cost centers are available here too.
- Watch the totals bar at the bottom: total debit, total credit, and the difference. The difference must be zero for the entry to balance; for example, if total debit is OMR 350.000, total credit must be exactly OMR 350.000.
- Attach supporting documents if needed (PDF files and images, up to 2MB per file) and write accounting notes explaining the transaction.
- Save. The entry is saved as a Draft and does not affect your reports until you post it.
Entry lifecycle: Draft ← Posted ← Reversed
Draft: your safe workspace
A draft entry is entirely yours: edit or delete it freely — it does not appear in any accounting report. This stage is your chance to review accounts, amounts, and balance before the entry becomes part of your official books.
Posting: the entry becomes final
Once you are sure the draft is correct, choose "Post" from the Actions menu. Posting is decisive: the entry then enters all reports and can never be edited or deleted afterwards. This is by design — it protects the integrity of your books and guarantees that posted figures never change retroactively.
Reversing: the only way to correct a posted entry
If you discover a mistake in a posted entry, the only correction path is "Reverse entry". The system creates a reversing entry that swaps debit and credit, dated the same as the original entry, fully cancelling its financial effect — while both entries remain in the record for audit. Then create the correct entry if needed. This keeps a full, transparent history: the mistake, its cancellation, and the correction.
Bulk posting
If reviewed drafts pile up — for example a batch you checked at week's end — you don't have to post them one by one. Select multiple drafts via the checkboxes in the table and post them in one batch. The system verifies each entry's balance individually before posting it, so no unbalanced entry slips through.
Automatic entries: review them like any draft
Not all entries are created manually; the system generates automatic entries from your operations. These arrive as drafts with a reference number prefix indicating their source (such as contract entries). Treat them like any draft: open, verify accounts and amounts, then post them into your reports. The "Automatic / Manual entries" tab helps you review each kind separately.
Locked periods
If an entry's date falls within a locked period — whether a manual lock or a closed fiscal year — the system rejects any creation, editing, posting, or reversal of that entry with a message stating the period is locked. This includes reversing posted entries, since the reversing entry carries the original entry's date. Lock management details are covered in the fiscal years article.
Frequently asked questions
Can I edit an entry after posting it?
No. A posted entry is final and can never be edited or deleted. The only correction path is "Reverse entry", then creating the correct entry if needed.
Why won't the system save or post my entry?
The most common reasons: the difference between total debit and total credit is not zero, the reference number is already used by another entry (it must be unique), or the entry's date falls within a locked period.
Do drafts affect my financial reports?
No. Drafts never enter the reports; an entry's effect appears in your reports only after it is posted.
What is the difference between a daily and an opening entry?
"Daily" is the usual type for ongoing transactions, while "Opening" is used to record accounts' opening balances. You pick the type in the first field of the creation form.
Next in the series ➜ Part 6: Trial Balance & Income Statement
Previous: Part 4 — Automatic Entries & Accounting Mapping · Series index