Advanced Accounting Guide 2/8 — Getting Started
A practical, step-by-step roadmap to activate Advanced Accounting in KIRA — from enabling automatic journal entries and preparing your chart of accounts and opening balances, to the daily review routine and monthly closing.
📚 Advanced Accounting Guide — Part 2 of 8 · Stage: Orientation · Full series index
Advanced Accounting in KIRA gives you a full double-entry general ledger built for the car rental business. Instead of recording every transaction by hand, the system generates journal entries automatically from your contracts, payments, and daily operations, delivering them as drafts ready for your review and posting — accurate books and reliable financial reports with far less effort.
This guide is a practical roadmap: five setup steps plus a daily and a monthly routine, whether you are starting fresh or migrating from another accounting system.
The roadmap at a glance
- Enable "Automatic journal entry creation" from the Settings page.
- Review the chart of accounts and add your own accounts.
- Link each bank account to its account in the tree.
- Import opening balances if you are migrating from another system.
- Define your fiscal year.
- Daily: review and post the automatic draft entries.
- Monthly: check the trial balance and lock the finished month.
Step 1: Enable automatic journal entries
Go to "Finance ← Advanced Accounting ← Settings" and turn on "Enable automatic journal entry creation". Once enabled, the system automatically generates journal entries for contracts, payments, and other operations. They arrive as drafts awaiting your review — nothing is committed to your books without your approval.
Note that enabling is not retroactive; automatic entries start from the moment of activation.
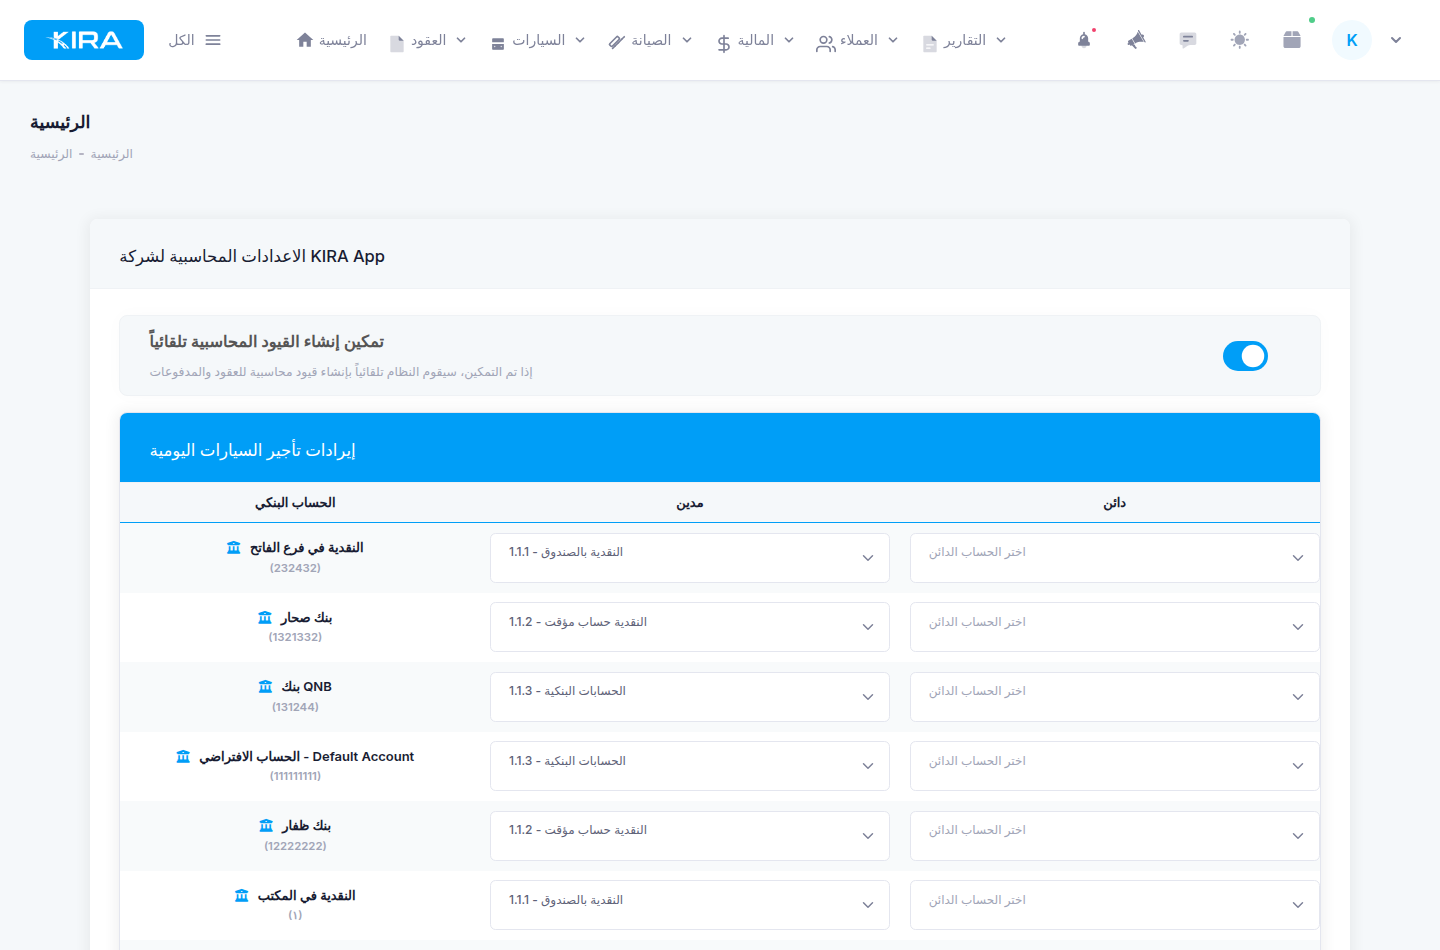
The enable toggle and account-mapping cards on the Settings page.
Step 2: Review the chart of accounts
The default template is ready-made for the car rental sector, organized under the five standard roots: assets, liabilities, equity, revenue, and expenses.
Review it, then add your own accounts to reflect your company, for example:
- Branch cash boxes (one per branch).
- Bank accounts.
- Employee custody accounts.
Place each new account under its correct root — the classification determines how it appears in your reports later.
Step 3: Link your bank accounts
From the same Settings page, link every bank account you have to its matching account in the tree, using the "Bank account" rows shown for each transaction type. This mapping is what routes cash movement — in and out — to the correct account in the automatic entries, so bank and cash balances never get mixed up.
Step 4: Import opening balances (if migrating)
If you are moving to KIRA from another accounting system, don't start from zero. From the "Fiscal Year" page:
- Download the opening-balances Excel template.
- Fill in each account's balance — debit or credit — from your latest trial balance. Example: main branch cash box OMR 1,500 debit and bank account OMR 12,000 debit, matched by credit balances on the liabilities and equity side for the same total.
- Upload the file; the system creates an opening entry as a draft.
- Review the entry on the Entries page, then post it.
Acceptance rule: total debits must equal total credits, or the import is rejected.
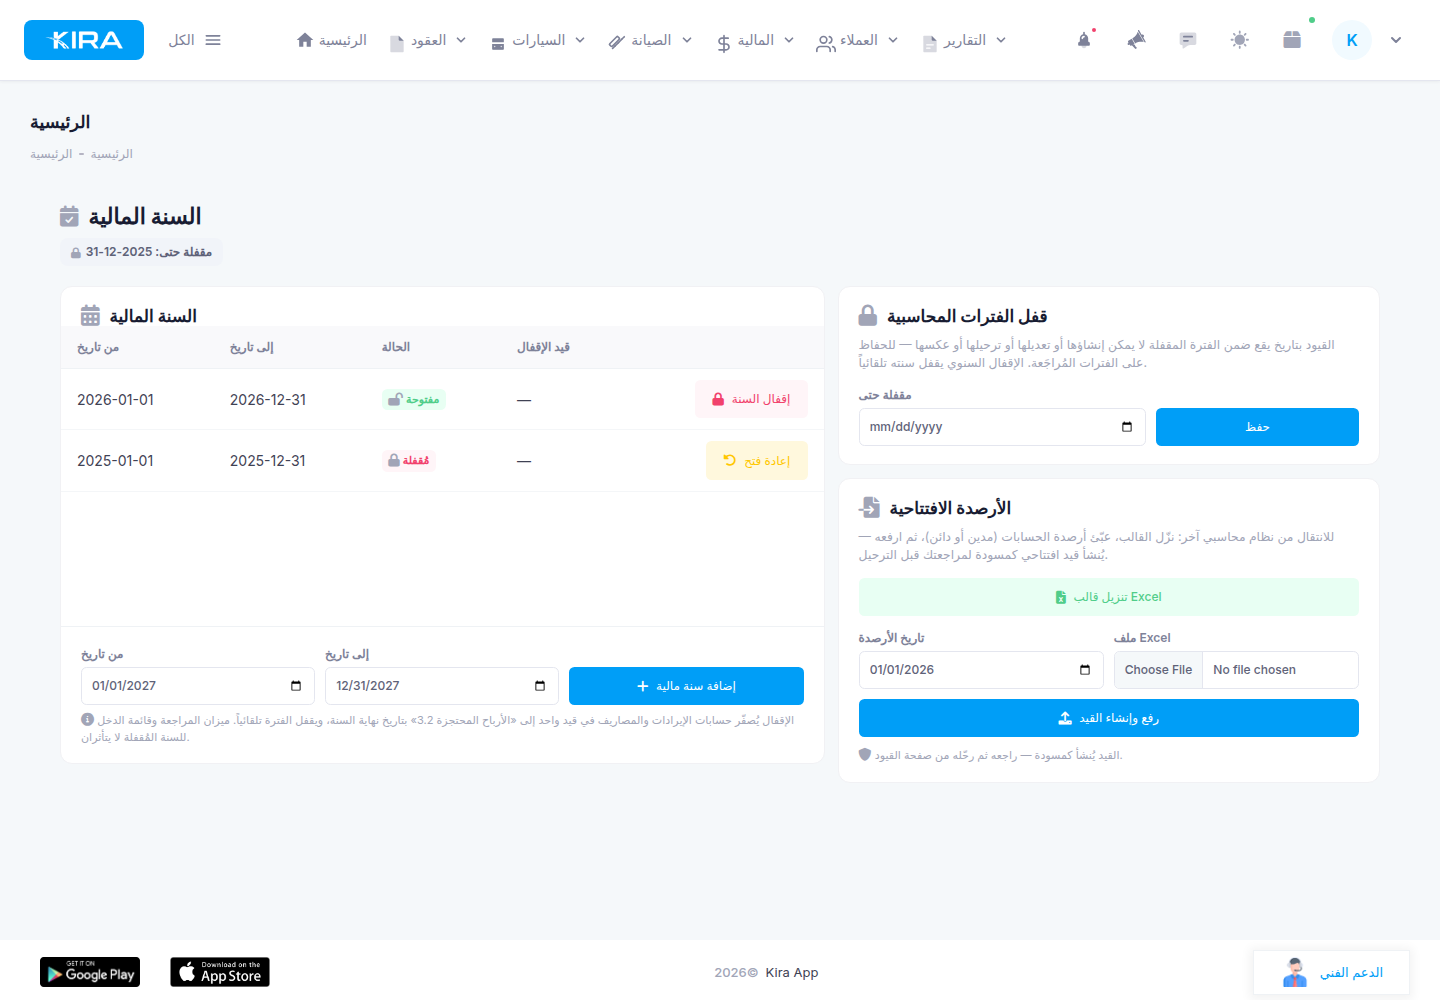
The Fiscal Year page: defining years, locking, and importing opening balances.
Step 5: Define your fiscal year
On the same "Fiscal Year" page, define your fiscal year with a from-date and a to-date. The system does not allow overlapping fiscal years, keeping your books cleanly organized year over year.
Daily routine: review and post the drafts
Once setup is complete, your daily work is simple. Open the Entries page and use the "Draft" tab together with the "Automatic entries" tab to see what the system generated, then:
- Verify each entry's accounts (debit and credit sides) and amounts.
- Post entries individually, or select several and use bulk posting.
Remember: drafts do not appear in any report until posted — posting is the moment an entry is officially committed to your books. You can always add a manual entry for anything the automatic generation does not cover.
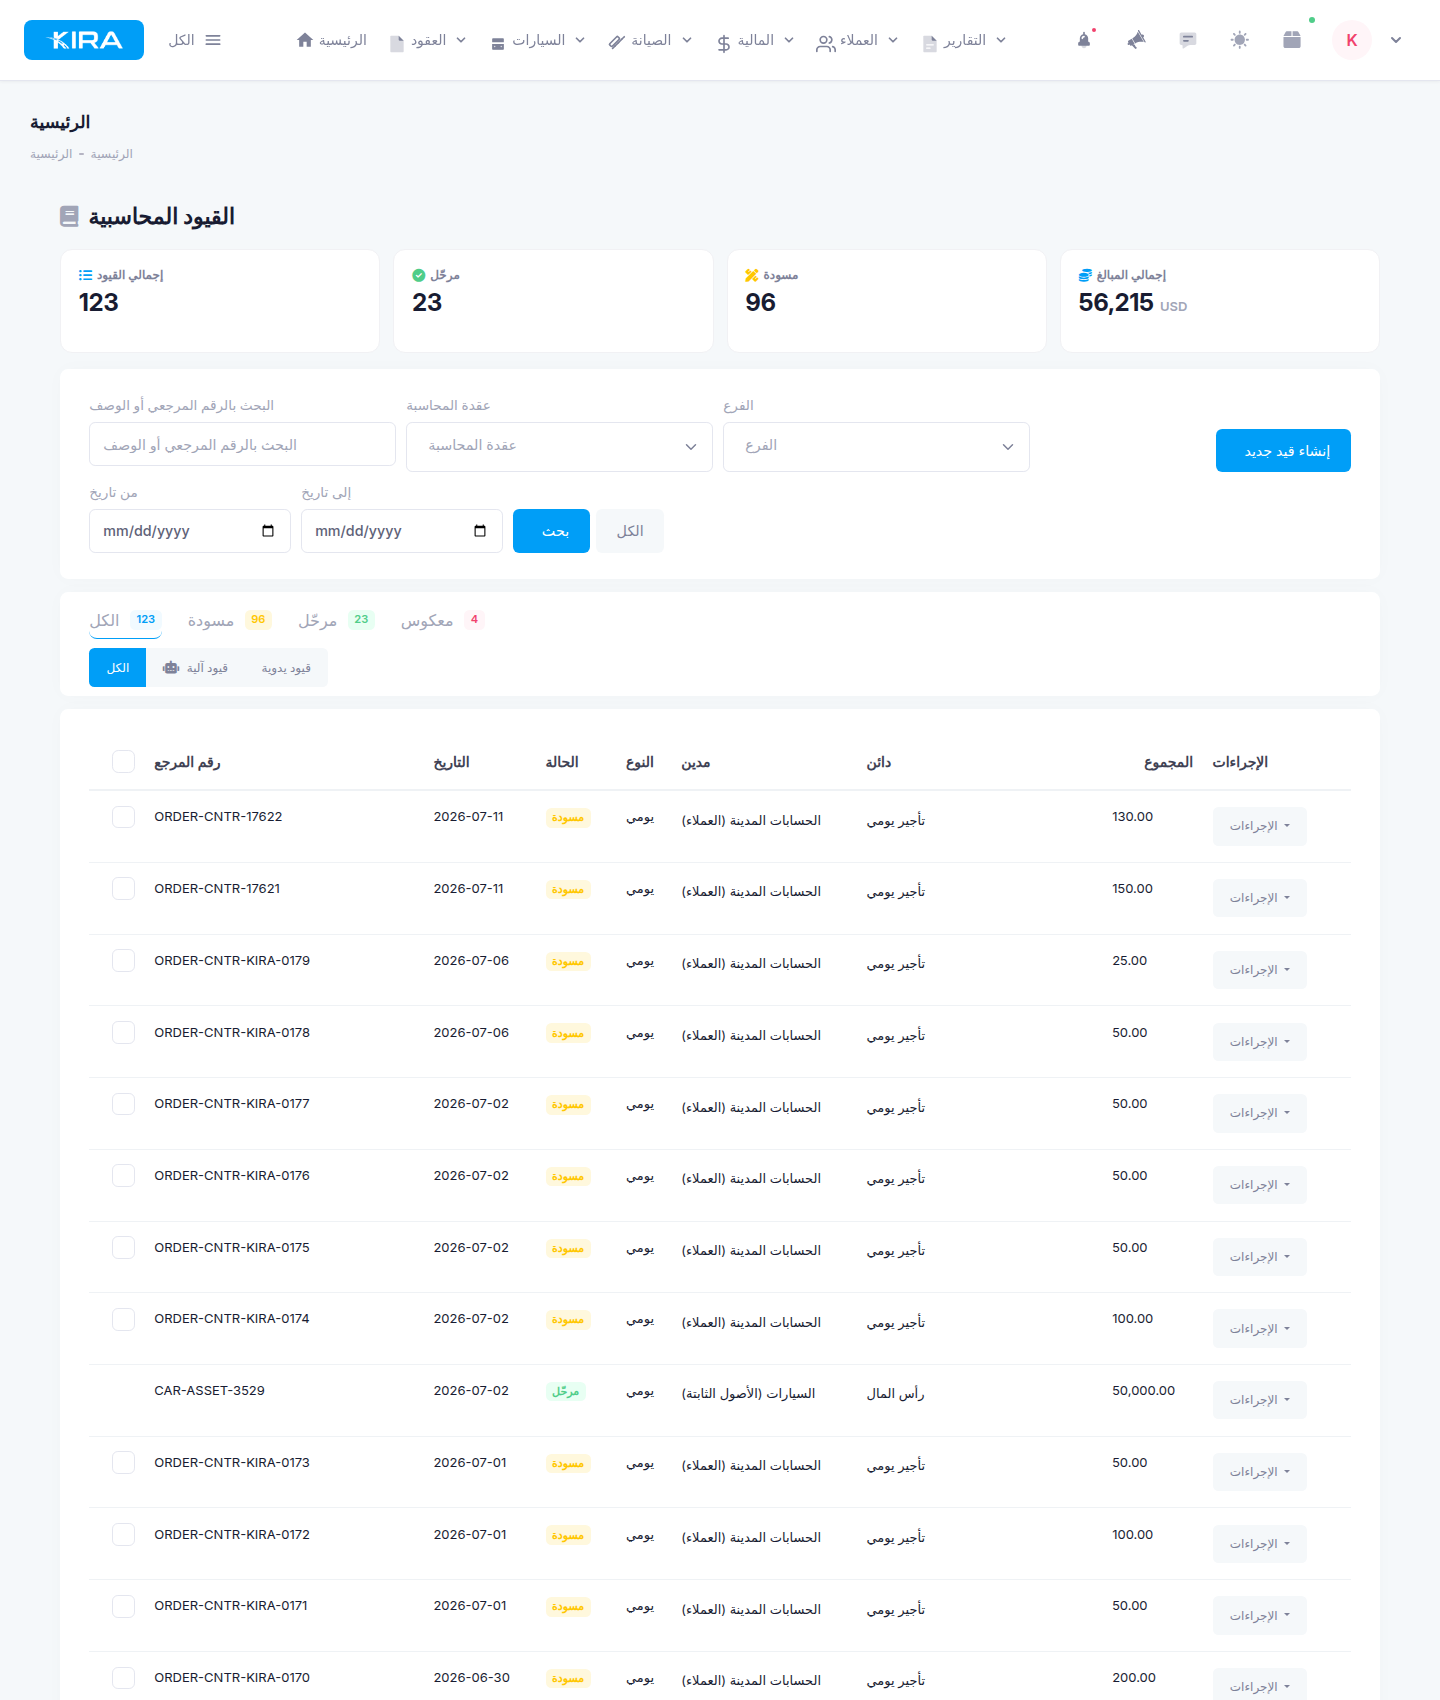
The Entries page where you review automatic drafts and post them.
Monthly routine: trial balance and period locking
At the end of each month, check the trial balance and make sure the "Balanced" badge is showing — your quick health indicator. After reviewing and posting the finished month, close it with the manual "Locked until" lock to protect the reviewed period from accidental changes.
Important notes
- Enabling is not retroactive: automatic entries start from activation. Earlier activity enters your books via opening balances or manual entries.
- A draft is not a committed entry: drafts do not enter any report until posted.
- Manual entry is always available: you can add a new manual entry at any time alongside the automatic ones.
FAQ
I enabled Advanced Accounting — why don't I see entries for my old contracts?
Enabling is not retroactive; automatic entries are generated for new operations from the moment of activation. Use the opening balances import or manual entries to bring in earlier periods.
The system generated automatic entries, but they don't show in reports. Why?
Automatic entries arrive as drafts, and drafts do not enter any report until posted. Review them on the Entries page ("Draft" and "Automatic entries" tabs) and post them individually or in bulk.
My opening balances file was rejected on upload. What should I do?
Make sure total debits equal total credits in the file — that is the acceptance rule. Correct the balances against your latest trial balance and upload again.
Can I record operations the system doesn't generate automatically?
Yes. You can always add a new manual entry from the Entries page for anything you need in your books.
Next in the series ➜ Part 3: Building Your Chart of Accounts
Previous: Part 1 — System Overview · Series index