Contracts Guide 2/9 — Create a New Contract with the Wizard
The 4-step contract wizard: contract type, vehicle and dates; then customer and driver; then details, pricing and extras; finally payments and confirmation — with a live price card beside you at every step.
📄 Contracts Guide Series — Part 2 of 9 · Stage: Creating the contract · Full series index
What you will learn
- Create a full rental contract through a clear 4-step wizard.
- Read the live price card that recalculates the total with every change.
- Set the pickup place, extras, custom pricing and daily kilometres.
Before you start
- You need the contract-creation permission.
- Preferably the customer and driver already exist (see part 1) — you can also add them from inside the wizard.
Step 1: Contract type and vehicle
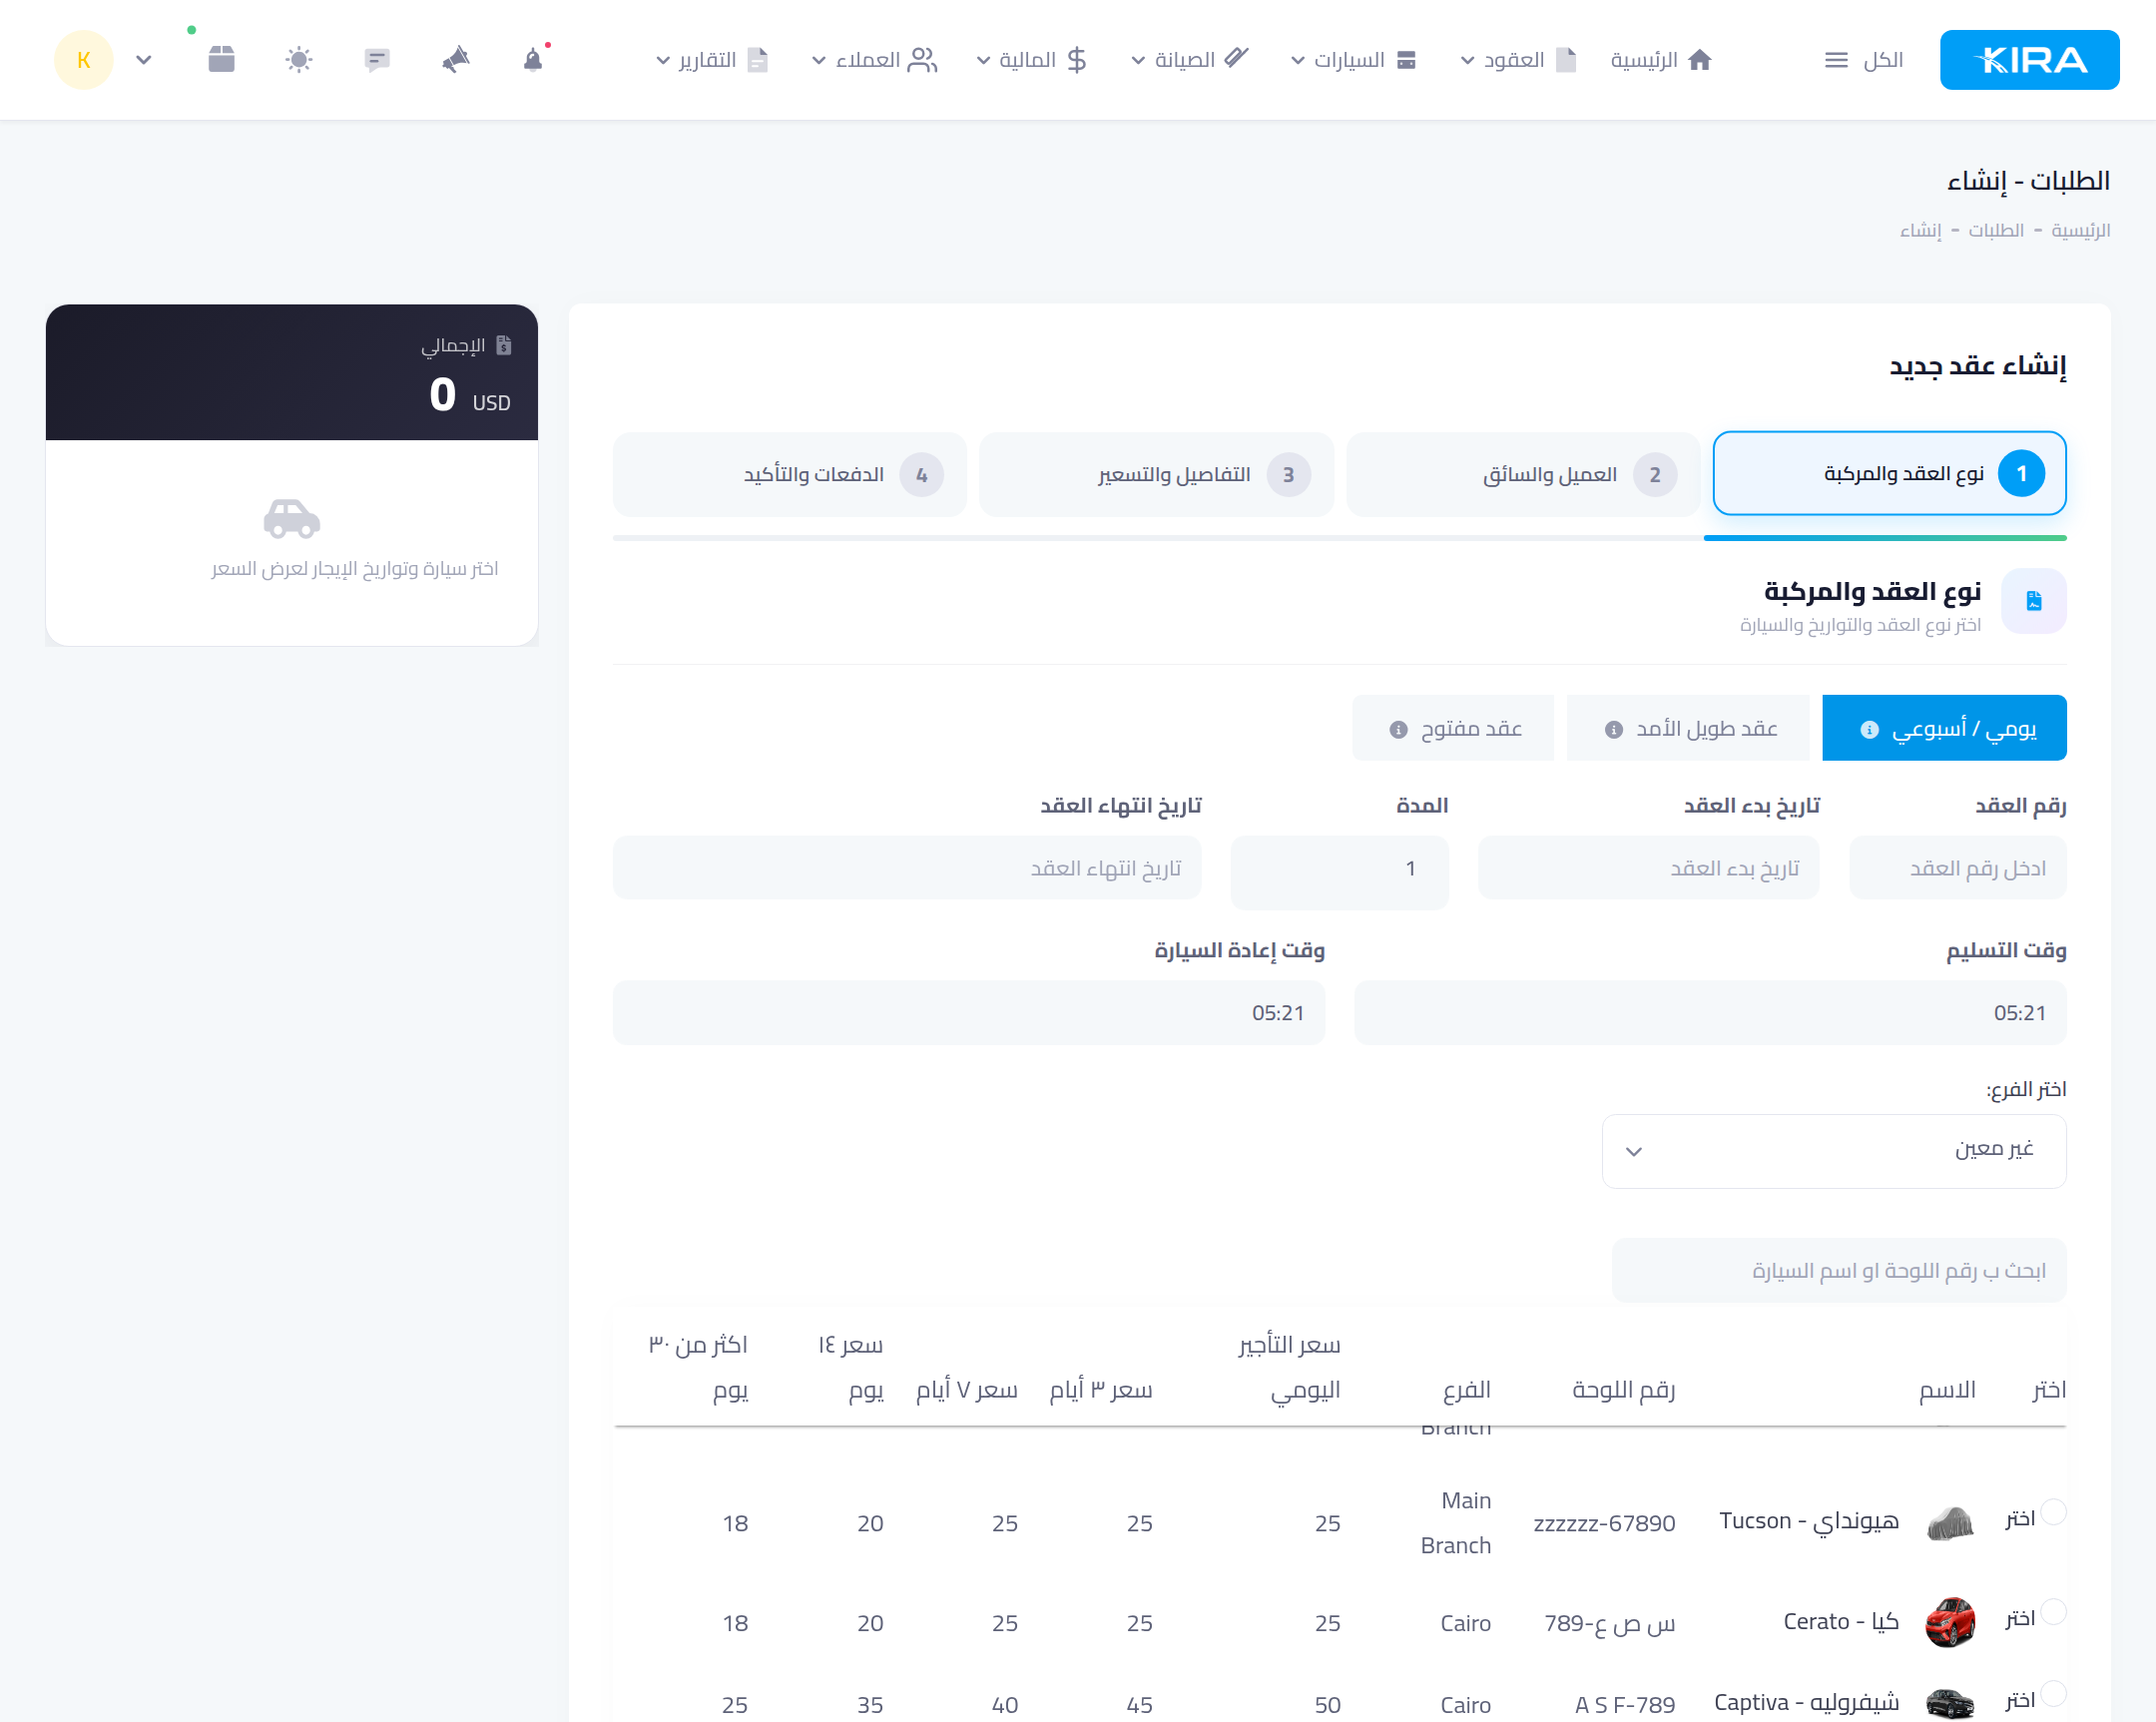
Open “Contracts → Create contract”. Pick the contract type and number (auto-generated), then the pickup and return date & time — once the dates are set, the table shows only the cars actually available for that period, with each price tier (daily, 3-day, weekly, monthly). Select the car by clicking its row and notice the side “Total” card already showing the live price.
Step 2: Customer and driver
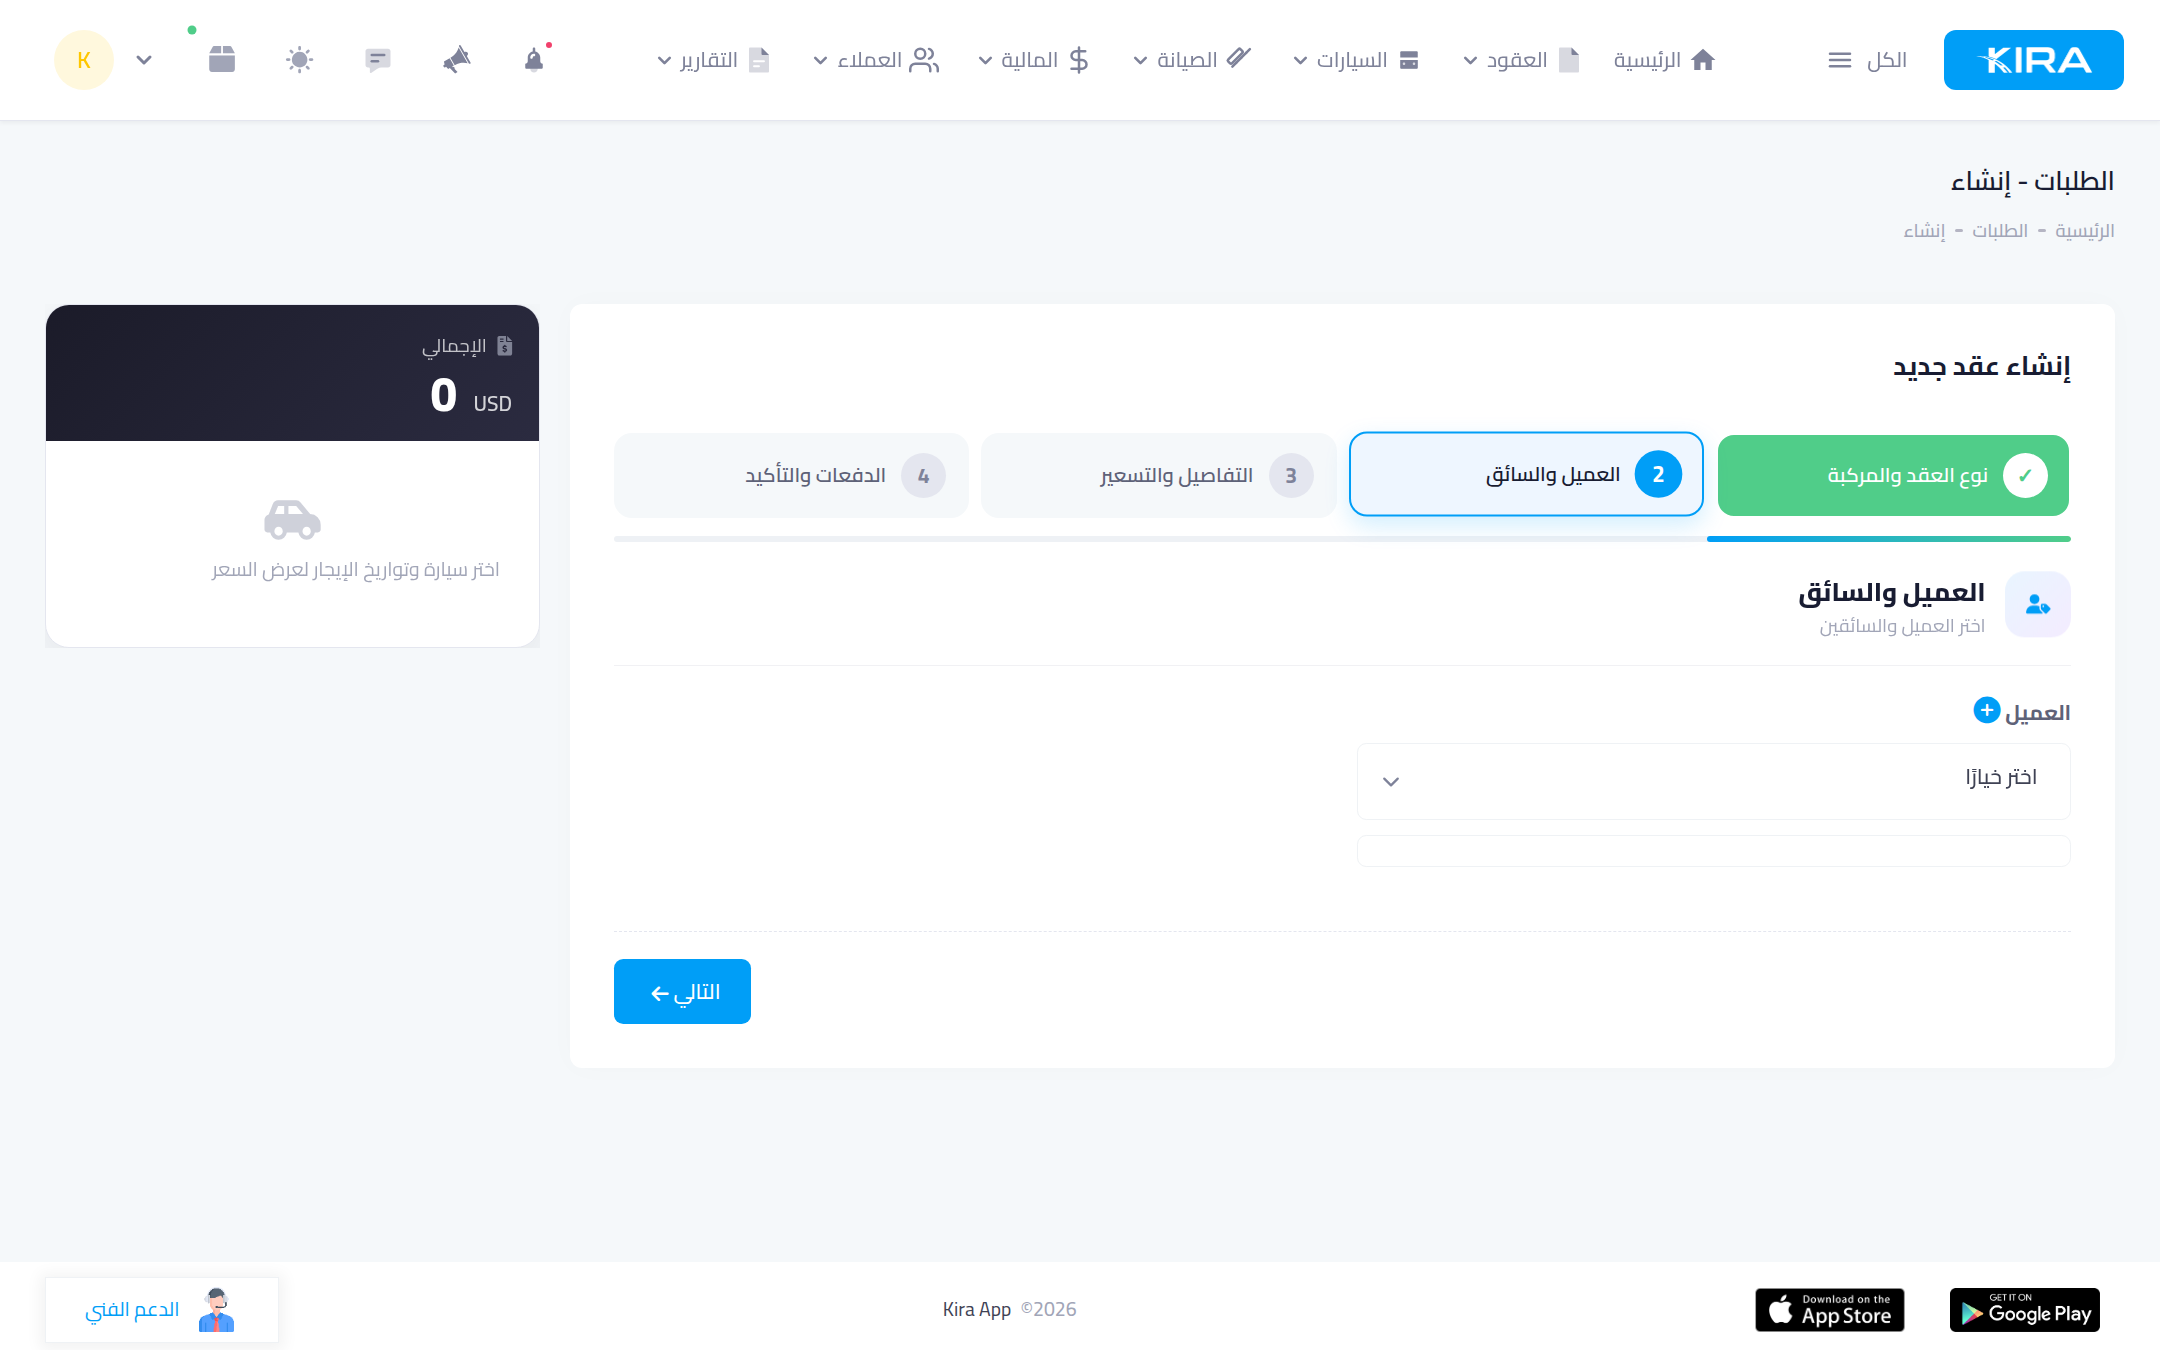
Pick the customer from the list, or press + to add a new one without leaving the wizard. Below the customer you can attach one or more documented drivers.
Step 3: Details and pricing
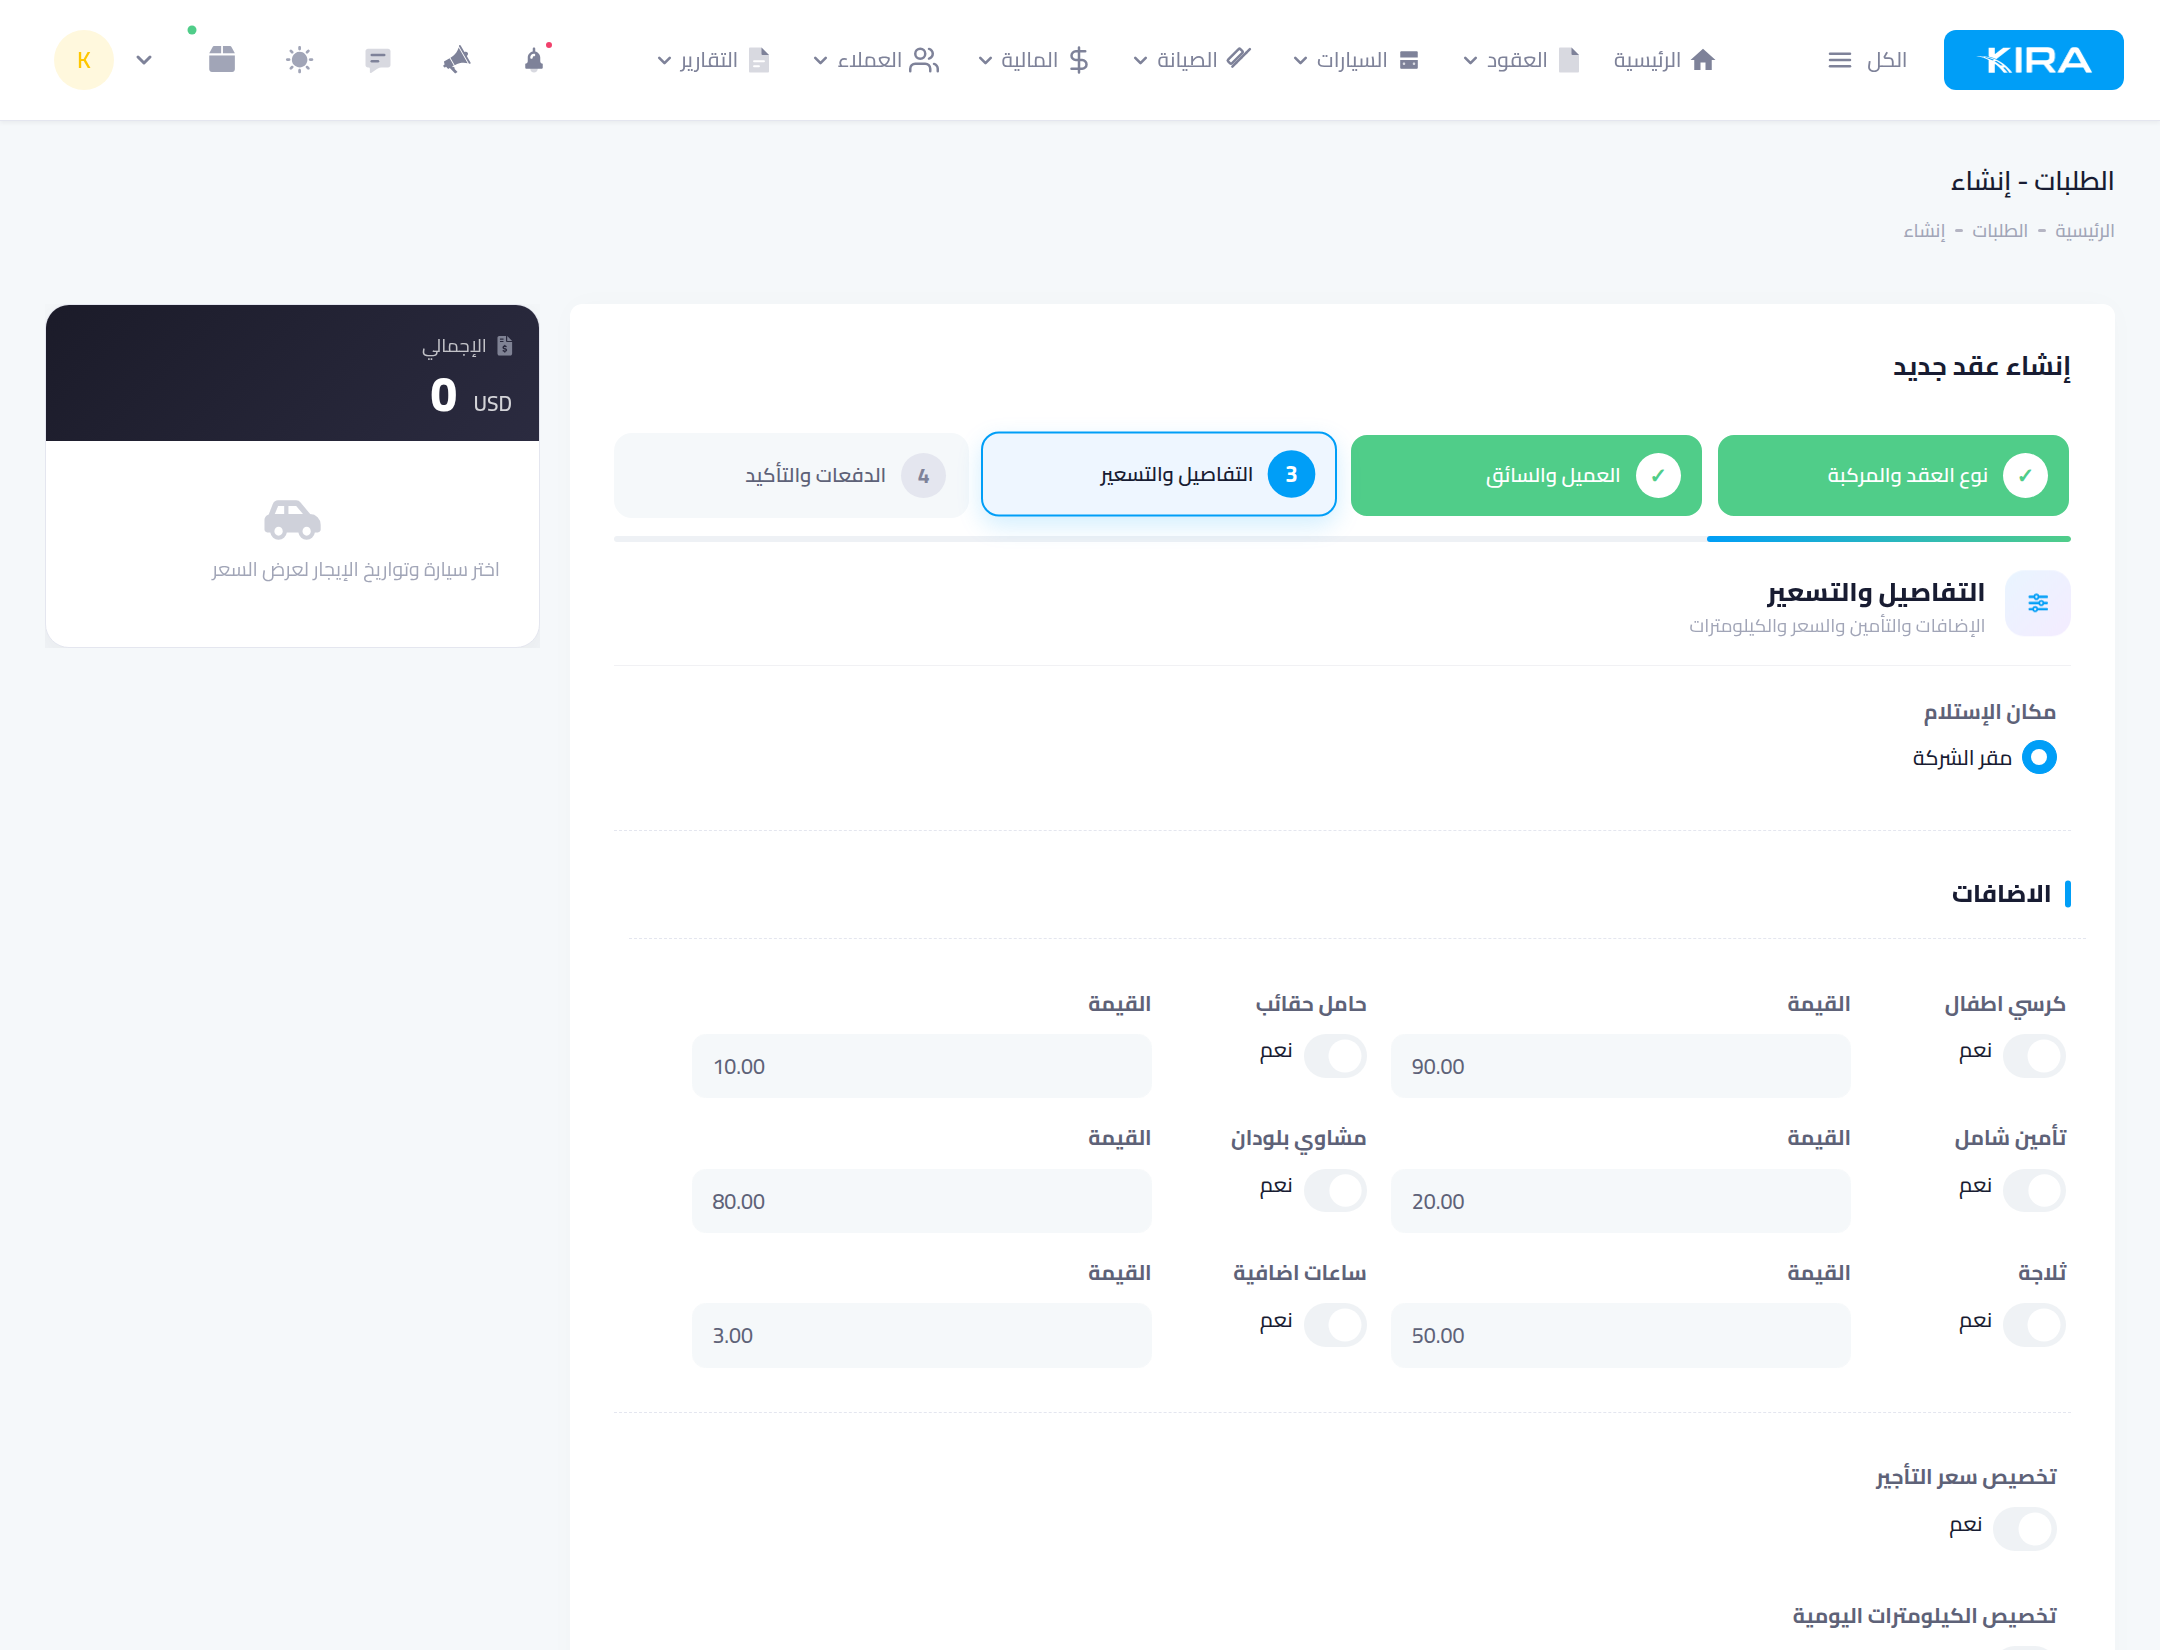
- Pickup place: company premises, or another location the customer pins on the map (when delivery is enabled for the car).
- Extras: child seat, full insurance and your other services — each has its price and updates the total instantly.
- Custom rental price: override the usual daily price for this contract only.
- Custom daily kilometres: set a km cap different from the car's default.
Step 4: Payments and confirmation
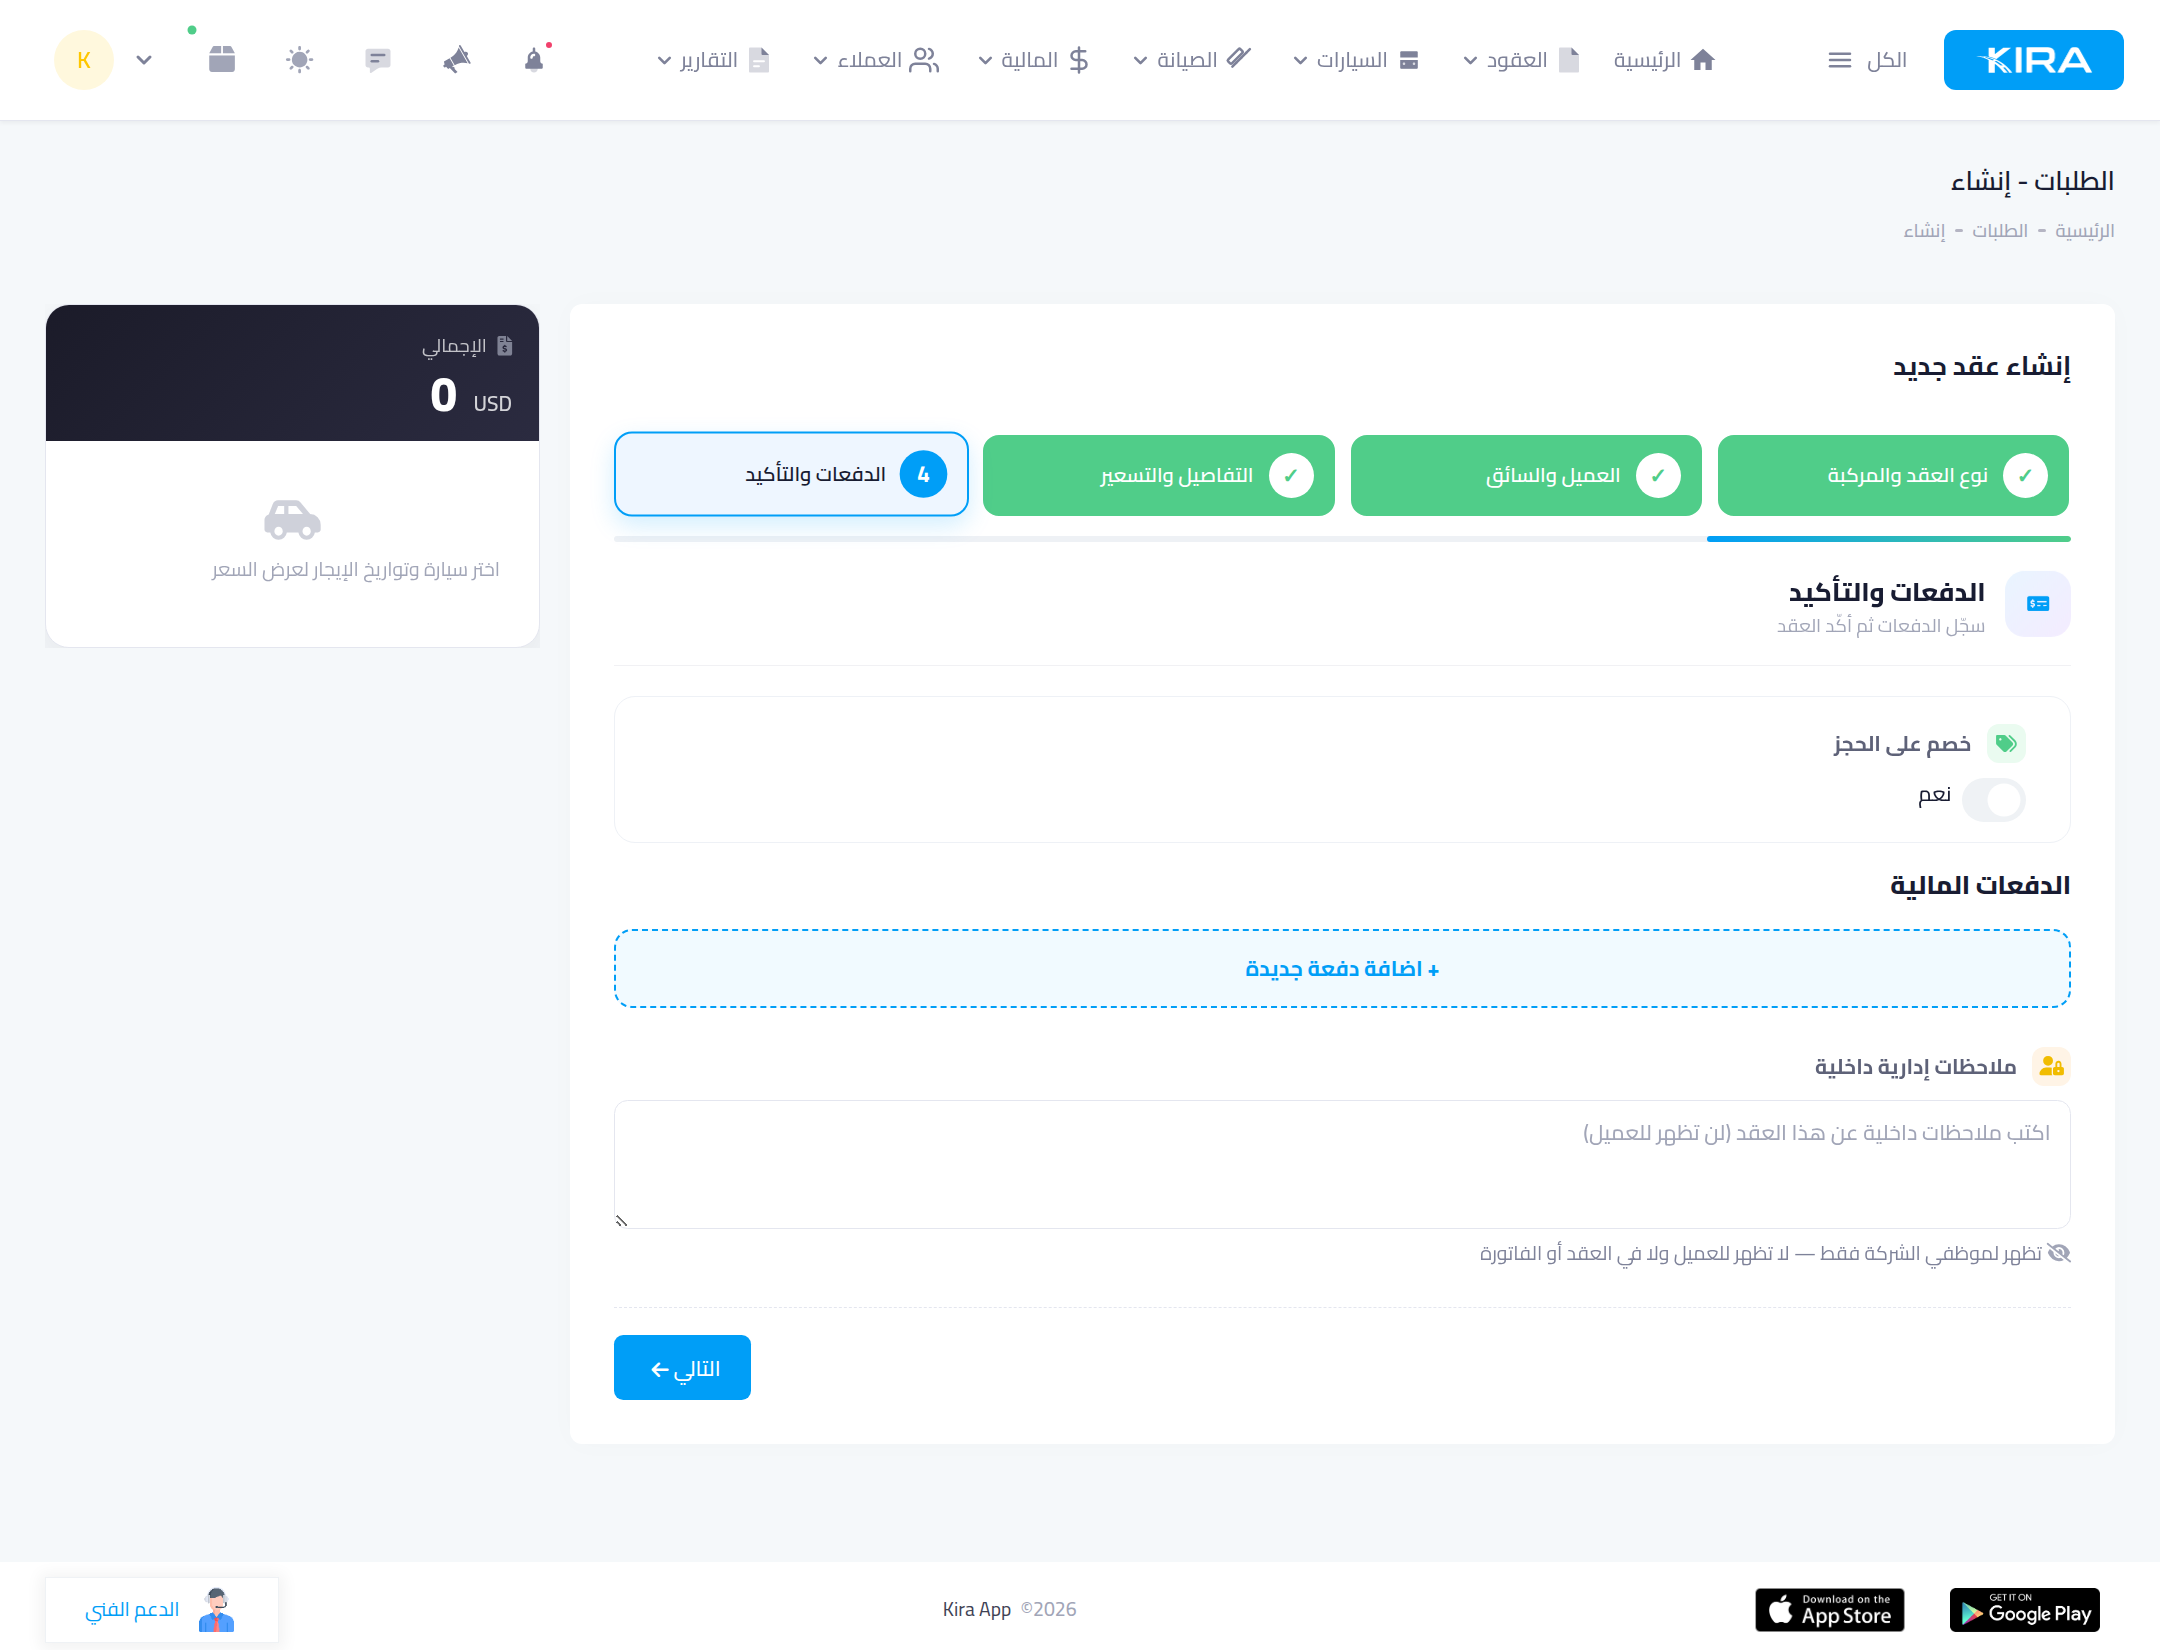
Record payments received at booking via “+ Add new payment” (cash, bank transfer…), and add “internal admin notes” if needed — visible to your staff only, never to the customer and never printed on the contract or invoice. Review the price card one last time and press “Save” to create the contract.
Common mistakes
- Choosing the car before setting the dates: set the period first so the table shows true availability and you avoid booking conflicts.
- Forgetting the advance payment: record it in step 4 at creation time so the debt ledger starts correct from day one.
- Writing sensitive notes in the wrong field: use “internal admin notes” — the only field the customer never sees.
⬅ Next in the series: Part 3: The E-Contract, Signatures and Sharing
Previous: Part 1 — Prepare Your Customers and Drivers · Series index